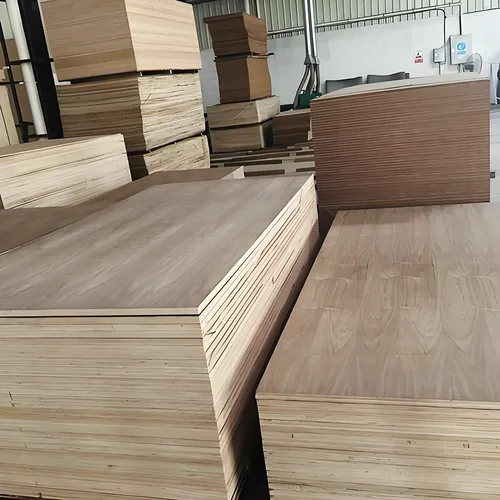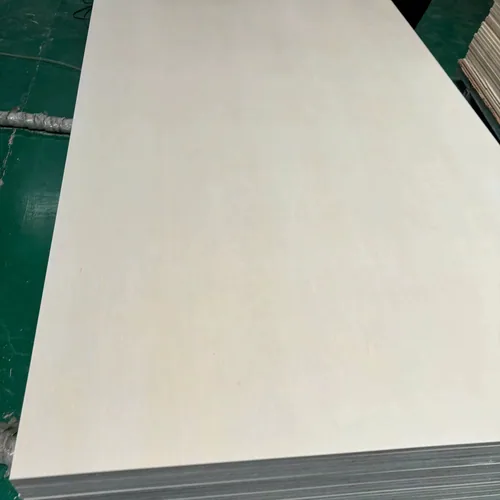
Specifications
Supply specifications
Regular sizes mm · width × length
On request
Other sheet sizes and cut-to-size panels on request.
| Thickness | Nominal thickness to your specification; finished thickness and tolerance quoted with the panel construction. |
|---|---|
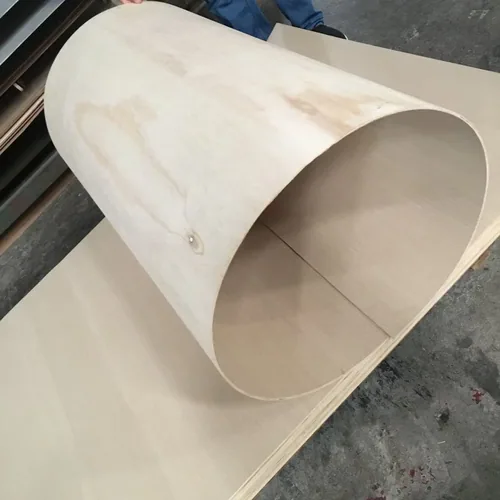
| Panel | Flexible plywood for curved furniture, reception counters, column wraps and interior forms. |
| Thickness & construction | Share the individual sheet thickness, tolerance and veneer construction required for your workshop trial. |
| Bend direction | Required flex direction marked on the full-sheet and cut-part drawing. |
| Finished curve | Reference radius, layer schedule, former or frame and finished component dimensions. |
| Facing & order | Veneer, laminate or paint, critical seam and return details, quantities and shipment port. |
Application-specific specification checks
Your bending plywood supply brief.
Start with your sheet or cut-part dimensions and required thickness. Include the bend direction and curve drawing so the proposed construction can be quoted for your workshop trial.
| Curve geometry | Reference radius, arc, component height, straight sections and drawing revision. |
|---|---|
| Panel construction | Individual sheet thickness, tolerance, veneer species and lay-up required for the part. |
| Bend direction | Required orientation marked on the full-sheet layout and cutting list. |
| Finished build-up | Layer sequence, adhesive, former or frame and final component thickness. |
| Decorative finish | Veneer, laminate or paint, with seam, edge and return details. |
| Order schedule | Sheet or part quantities, sample dimensions, packing and destination port. |
Ask for an offered thickness schedule matched to the drawing: nominal sheet gauge, measured tolerance, veneer construction, format and flex direction. List the individual sheet and finished component thickness separately. Use the measurement plan and the cutting-list guide with your curve section.
Use the curve drawing to identify which panel construction and sample you need. For the visible surface, compare the decorative veneer guide alongside your forming process.
CHOOSE THE ROUTE THAT FITS YOUR WORKSHOP
A one-off feature, a furniture range or repeat components.
Begin with the part that matters most to your project. Use a representative trial to bring the curve, finish and production sequence together.
A sheet thickness is one part of the finished curve.
CUZI quotes bending plywood thickness and construction for the project. Send the required single-sheet gauge and the complete layer schedule; the offer identifies the actual panel model, finished tolerance, compatible format and direction. Review the delivered flat sheet or separately requested formed component on its own item line.
Scroll horizontally to compare all columns.
| Build-up to discuss | Thickness and material schedule | Request the offered construction |
|---|---|---|
| Flexible skin on a frame | Individual flexible plywood gauge, tolerance, veneer schedule and flex direction; support/frame and the completed surface are listed on the component drawing. | Ask for model and gauge options that suit the proposed curve. Discuss a flexible sheet gauge |
| Laminated curved substrate | Gauge and orientation of each layer, adhesive/process, former and finished substrate thickness. Compare actual formed and released dimensions at the same stage. | Keep individual sheet thickness and total build-up distinct. Discuss a layered curved substrate |
| Faced and finished curve | Curved substrate plus selected veneer/laminate/paint, adhesive, reverse treatment, edge and return. Include final thickness/shape and the finishing sequence. | Try the full skin and its joint on the selected substrate. Request a finished-curve trial |
Develop a curved feature
Send the plan and section of your counter or wrap. Try the critical seam, return or transition with your chosen finish.
Plan the curved sampleBuild a furniture prototype
Compare the proposed sheet in your layer schedule and forming jig. Review the released shape and final surface before choosing the production item.
Prepare the component briefPlan repeat fabrication
Keep the panel, bend direction and cutting list with the workshop's jig reference. Quote quantities for the range you expect to build.
Plan your repeat orderCOMPARE OPTIONS
Your selection at a glance
Shape & direction
Mark the bend on the sheet and cutting layout. Include the reference radius, arc and component dimensions with the proposed panel.
Layers & finish
Compare the complete curved build-up: panel layers, adhesive, former or support, and veneer, laminate or paint. Keep seam and return details in the trial.
Cost & repeat supply
Compare usable parts, forming and finishing work against the same component. Retain the selected sheet, jig and process references for the next order.
TRY THE CURVE IN YOUR OWN WORKSHOP
Form it. Face it. Check the finished detail.
Request a free bending plywood sample with the thickness, direction and component you want to review. Share the radius and sample dimensions needed for your former or jig. The buyer pays freight, with a credit towards a later order available by agreement.
- Choose the sheet and orientationLink the proposed panel to the drawing, cut direction and forming surface. Keep the sample reference with the quotation.
- Build the representative curveUse your planned layers, adhesive, support and finish. Include a seam, edge or return that matters to the component.
- Record the result for productionMeasure the shape at your agreed review stage. Retain the jig, process and finish references with the selected panel item.
Review the curve after release from the former
Record the layer schedule, adhesive instructions, curing conditions and release timing. Check the released dimensions, joint fit and visible surface at the same stage in each trial. Keep these process details for the production run.
TURN A SUCCESSFUL CURVE INTO A REPEATABLE ITEM
Keep the panel and the process in one record.
Use the worksheet for your prototype and repeat orders. It connects the sample, former, finished surface and part dimensions your workshop wants to reproduce.
| Check | Record during evaluation |
|---|---|
| Drawing & orientation | Component, reference radius, arc, height, bend arrow and drawing revision. |
| Panel & layers | Sample identity, construction, individual thicknesses, layer order and finished build-up. |
| Former & process | Jig reference, adhesive, clamping, curing conditions and release timing. |
| Released shape | Review stage, dimensions, springback observations and fit to the frame or adjacent part. |
| Facing & detail | Veneer, laminate or paint, seam position, edges, returns and visible surface observations. |
| Selected item & repeat | Chosen panel and process references, required adjustments and next-order quantities. |
Review a change in the formed component
The released part opens away from the jig
Compare the complete layer and process records at the same review stage. Review the forming and adhesive sequence with your workshop and adhesive supplier, then record the next trial change.
The facing changes the curve or surface
Compare the substrate trial with the faced component. Include the surface material, seam, edge and finishing sequence when selecting the final build-up.
PANEL INFORMATION FOR YOUR FORMING PROCESS
Put the proposed sheet beside the curve drawing.
Request product information for the panel being quoted. Include your intended bend direction, component use and destination, plus any emission or project requirements your team needs to review.
Give every radius a surface and a review stage.
Keep supplied panel bending information and your complete formed-part record side by side. Name the radius reference and review stage on each: a tool surface, a layer and the released outer face can have different dimensions.
Scroll horizontally to compare all columns.
| Decision to settle | Record with the proposed material | Ask for that information |
|---|---|---|
| Offered panel and flex direction | Model/sample, veneer species/gauges/lay-up, nominal and measured thickness/tolerance, full-sheet dimensions and marked easy-bend direction; relevant bond/emission methods and results. | Put the drawing gauge beside the offered sheet schedule. Request bending panel data |
| Radius capability for the chosen sheet | State whether the radius is inside, forming-tool or another named surface; material model, thickness/direction, specimen dimensions, conditioning, method, support and criteria. Match any stated minimum to that recorded scope. | Carry your required radius and section into the discussion. Request matched radius information |
| Released and decorated component | Layer schedule, adhesive/process conditions, former, release/review timing, measurement positions, retained shape/fit, facing and seam/edge observations. | Compare the finished build-up with your own assembly requirements. Request formed-component information |
Keep the information with the sample and drawing revision. Your workshop can then compare the same material through forming, facing and repeat purchases.
Connect radius information with the finished build-up
Ask which construction, direction and conditions the supplied bending information covers. Trial your selected panel with the layer sequence, adhesive and decorative surface intended for the finished part.
Product data & reports to request
Request a technical data sheet covering:Veneer lay-up, bend direction, thickness tolerance and the proposed assembly method.Include these specification details:- Veneer construction, individual panel thickness and dimensional tolerances.
- Sheet orientation and bending information relevant to the proposed panel.
- Panel identification and any requested product or destination-market documents.
Company documents to view
FSC chain of custody Wood panels · purchase & salesISO 9001 & ISO 14001 Management systems · stated sales activitiesEN 13986 plywood document Non-structural scope · listed modelsUse these for supplier qualification; match product performance to the proposed panel’s technical documents.Curved components: what to match
- Technical data
- Veneer lay-up, bend direction, thickness tolerance and the proposed assembly method.
- Assembly trial
- Match the documented panel to the former radius, adhesives, number of layers and decorative finish used in your sample.
- Destination
- Include the finished application and any emission or fire requirement for the complete assembly.
BEFORE YOU ORDER
Ordering information
- Minimum order
- 1 container
- Regular lead time
- 10–15 days
- Samples
- Free samples
- Quotation terms
- FOB / CIF
Sample freight & order notes
- Minimum order: Mixed loads available.
- Regular lead time: Production; shipping time is additional.
- Samples: Buyer pays freight; credit available on a later order.
- Quotation terms: Name the port in your inquiry.
DELIVERY THAT FITS THE CUTTING PLAN
Keep the sheet orientation clear from bundle to workshop.
Request FOB at the shipment port or CIF at the destination port. Include quantities, pack handling limits and the receiving date so shipment can be discussed with your production plan.
For flat flexible sheet stock, specify pack support and protection with the item list. Keep the bend direction and cutting reference on the schedule and labels, then check sheet counts and condition before preparation.
Include your destination and receiving requirements with your bending plywood inquiry. Use the receiving and storage guide with the panel model, bend-direction labels and cutting list.
Include formed-part requirements separately
If you need a formed component rather than flat sheet stock, send its finished geometry, process and packing requirements for a separate quotation discussion. Agree the delivered form and handling arrangement with that item.
FROM A CURVED IDEA TO A WORKSHOP-READY BRIEF
Make room for the curve in your design.
Choose the flexible panel with the finished surface and forming process in mind.
A rounded cabinet end, a reception counter or a column wrap begins with the shape you want your customer to see. Bring CUZI the radius, height and bend direction, together with your planned veneer, laminate or paint finish. We can discuss the proposed bending plywood and sample against that design.
The flexible sheet sits within a finished build-up: support, laminated layers, adhesive and decorative skin may all be involved. Keep those details with the panel description so the workshop trial represents the component you intend to produce.
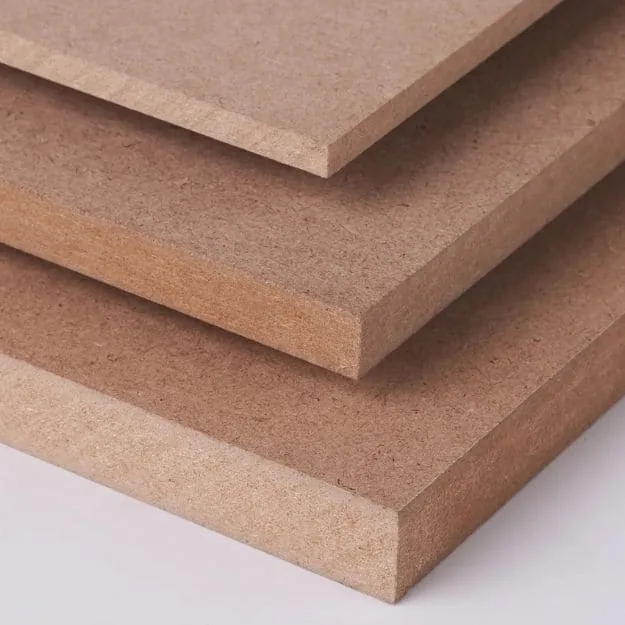
Considering an MDF substrate for the same curve? Start a flexible MDF project inquiry and compare the proposed construction, forming direction and finished sample against your plywood route.
Make the bend arrow do the explaining.
Use L and W as dimensions on your drawing, then identify which one travels around the curve. Long-grain or cross-grain product descriptions are checked against the offered veneer schedule and marked flex direction. The decorative grain you want to see is recorded separately.
Scroll horizontally to compare all columns.
| Drawing orientation | How to mark the part | Request the correctly oriented trial |
|---|---|---|
| Curve along the long dimensionDrawing orientation only; match the offered sheet's flex direction. | The dimension L follows the arc; the bend axis is parallel to W. Add your actual width/length, finished height, cut-part grain and the inside/forming radius reference. | Have the proposed material direction marked against that drawing. Request a long-dimension curve trial |
| Curve along the short dimensionDrawing orientation only; match the offered sheet's flex direction. | The dimension W follows the arc; the bend axis is parallel to L. Mark the same arrows on the full sheet, cut blank and former drawing. | Keep the cut orientation and offered panel model together. Request a short-dimension curve trial |
Mark the bend on the sheet layout
Show an arrow for the required bend direction on the full sheet and cut part. Include the curve section and the inside or forming radius it refers to. This gives purchasing and cutting teams the same orientation reference.
SHAPE THE PART YOUR CUSTOMER SEES
Rounded furniture, curved counters and column wraps.
Scroll horizontally to compare all columns.
| Component | Complete the workshop trial | Begin with the critical feature |
|---|---|---|
| Furniture and cabinet ends | Curve, finished edge and facing in one prototype; transition to the straight panel, seam position, hardware and actual fit. | Include the end return beside the adjoining cabinet face. Request a curved cabinet-end sample |
| Reception and retail counters | Curved plan/elevation/section, top transition, layers/frame, seams and returns with the selected decorative skin. | Use a representative corner or tangent joint. Request a counter-detail trial |
| Column wraps and interior features | Wrap height, radius/reference surface, support and joint positions; full-sheet/cut-piece flex direction and fitting sequence. | Record the seam, support and finishing around the wrap. Request a column-wrap trial |
For thin cut parts within a different construction, explore precision plywood requirements. Keep the flexible skin and the supporting component on their own material lines.
A CURVED COUNTER BRIEF YOUR TEAM CAN SHARE
Bring the radius, layers and finish into the same drawing.
For a curved reception counter, show where the arc meets the straight section and how the decorative skin returns at the edge. These six details help your buyer and workshop compare a complete component.
- Curve & reference
- Inside or forming radius, arc, height, tangent sections and drawing revision.
- Sheet & direction
- Individual panel construction, thickness, tolerance and bend arrow on the cutting layout.
- Layers & former
- Layer schedule, adhesive, jig or support reference and finished component thickness.
- Facing & joints
- Decorative material, grain appearance, seams, top transition, edges and returns.
- Trial & quantities
- Sample dimensions, review stage, part counts and repeat-production requirements.
- Packing & port
- Flat-sheet support, item labels, receiving limits, FOB/CIF port and planned arrival.
Turn the reference arc into a cutting-plan starting point.
For an illustrative 500 mm reference radius and 90° arc, L = R × θ = 500 × π/2 = 785.4 mm. With two 100 mm tangents and 20 mm total trimming allowance, the example developed length is 1005.4 mm.
Choose the relevant cutting reference for each layer on your own drawing. Add the actual tangent, joint and trim allowances; review the blank and released component on the former. This is a geometry illustration, with material capability and the finished fit evaluated separately.
Discuss your arc cutting planPrice the blanks, then price the completed curve.
Consider an assumed order of 100 curved counter sections, each with two plywood layers. Both blanks are 600 mm high. The drawing gives a 90° arc at each layer's own reference: 500 mm for layer A and 506 mm for layer B, plus two 100 mm tangents and 20 mm total trim. The geometric blank lengths are 1005.4 and 1014.8 mm, respectively. The 6 mm difference between reference radii is a drawing assumption; offered sheet gauges, adhesive and facing are scheduled separately.
The following cutting comparison uses 5 mm trim on every sheet edge, 3 mm saw kerf, fixed rectangular orientation and no joint nesting. For 100 pieces of each layer, buy whole sheets separately for A and B. A small increase in blank length can remove a whole row from the layout. Bend direction is matched to the proposed sheet before cutting.
Scroll horizontally to compare all columns.
| Sheet format | Arc follows L | Arc follows W |
|---|---|---|
| 1220 × 2440 mm | 4 blanks per sheet; 25 sheets per layer; 50 sheets total; 148.8400 m² purchased. | 4 blanks per sheet; 25 sheets per layer; 50 sheets total; 148.8400 m² purchased. |
| 1250 × 2500 mm | 4 blanks per sheet; 25 sheets per layer; 50 sheets total; 156.2500 m² purchased. | 4 blanks per sheet; 25 sheets per layer; 50 sheets total; 156.2500 m² purchased. |
| 1525 × 3050 mm | Layer A: 6 blanks per sheet, 17 sheets. Layer B: 4 blanks per sheet, 25 sheets. 42 sheets total; 195.3525 m² purchased. | 5 blanks per sheet; 20 sheets per layer; 40 sheets total; 186.0500 m² purchased. |
The 1525 × 3050 mm L-oriented layout fits three rows of layer A but only two of layer B: after 10 mm total edge trim, the 3040 mm usable length cannot take three 1014.8 mm blanks plus two 3 mm kerfs. This is why every layer needs its own cutting line. That format uses fewer sheets but more purchased area than 1220 × 2440 mm in this layout. If both layers use the same price basis, compare 50 × the smaller-sheet price with 42 × the larger-sheet price: equal panel bills occur at a larger-to-smaller sheet-price ratio of 50/42, approximately 1.190. If layer constructions or prices differ, calculate each layer separately. These are rectangular cutting quantities; trim recovery, production rejects and trial consumption change the purchasing reserve.
Compare the actual workshop total: (both layers' panel bill + cutting + former/setup + adhesive/clamping/curing + facing/edge work + rejects and rework + agreed delivery costs) ÷ accepted finished curves. Count the completed curves at the same released and finished stage, then use the finished-part quotation comparison with your observed process costs. This keeps a cheaper sheet from hiding extra forming or finishing work.
Estimate the developed length of a simple arc
At a selected layer's reference radius, developed arc length equals radius × angle in radians. A 90-degree arc at a 500 mm reference radius is approximately 785 mm. Add tangent lengths and the trimming and joint allowances from your workshop drawing; use the appropriate reference radius for each layer. The finished curve is reviewed through the component trial.
SUPPLY FOR THE CURVES YOU BUILD
Plan the panel mix around your production range.
Orders begin at one container, with mixed loads available. List quantities by panel construction, thickness, sheet size and bend direction to build the quotation around your furniture or fit-out programme.
Regular production takes 10–15 days; shipment time is additional. Include your planned production start, destination and any cutting or product-document requirements when discussing the order schedule.
For recurring components, retain the sheet specification and sample reference alongside your former, layer schedule and finish. Quote the next order with the same item description and identify any design changes.
Compare the cost of the finished curve
Review usable parts per sheet, trimming allowance, assembly time and finishing work for each proposed construction. Keep the finished component dimensions and shipment scope the same when comparing material offers.
FAQ
Bending plywood purchasing questions.
What is bending plywood used for?
Flexible plywood is used within curved furniture, reception counters, column wraps and decorative interior forms. Choose the panel with the component's layers, support and finished surface in mind.
Which sheet sizes are regularly supplied?
The regular plywood formats are 1220 × 2440, 1250 × 2500 and 1525 × 3050 mm. Sizes such as 1220 × 3050 and 1250 × 3660 mm, other formats and cut panels are available on request.
How do I specify thickness and bend direction?
Give the individual sheet thickness and finished build-up separately. Mark the required bend on the full sheet and cut-part layout, then include the radius and curve section with your inquiry.
What is the minimum bend radius?
Request bending information for the proposed construction and direction. Bring your required radius, layers and finish into a sample trial on the intended former before choosing the production item.
Can I finish it with veneer, laminate or paint?
Include the selected decorative surface and forming sequence in the brief. Compare your veneer, laminate or paint on the finished curve, including the seam and return detail.
How do I allow for springback?
Record the former, layers, adhesive, curing conditions and released shape in your workshop trial. Use the same review stage to compare revisions and keep the selected process with the panel item.
Can I request a sample for my curved prototype?
Yes. Share the radius, bend direction, desired thickness and sample dimensions for the part you want to trial. Include your delivery country when requesting the proposed sample.
What should I send for a load-carrying curved part?
Send the engineered assembly drawing, material designation and required performance data for the complete component. Include the flexible sheet within that specified build-up.
Can I mix sizes and products in one order?
Orders start at one container and mixed loads are available. List sheet sizes, constructions, bend directions and quantities by item so the mix can be priced and packed together.
Are samples free, and who pays freight?
The sample is free; freight is paid by the buyer. A credit towards a later order can be agreed. Tell us the sample dimensions and what you plan to evaluate.
What lead time and quotation terms are available?
Regular production is 10–15 days, with shipping time extra. Request FOB with the shipment port or CIF with the destination port, and include your planned receiving date.
Which thickness should I put on a bending-plywood inquiry?
Put the required individual sheet gauge and finished component thickness on separate lines. Ask for the offered model and thickness schedule with its veneer construction, tolerance, format and flex direction, then compare the sheet in your complete trial.
Is a long-sheet curve the same as a long-grain panel?
Use the L/W bend arrows to show your geometry, and check the offered panel's actual grain/lay-up and marked flex direction separately. Product grain names depend on the defined sheet orientation. For a manufacturer-specific illustration, see Columbia's direction diagrams; send your own full-sheet/cut-part drawing with the oriented sample request.
Does my radius refer to the inside or the outside face?
Name the surface or former reference on the section. Identify the radius for the layer being measured and record the formed/released stage. Ask for matched radius information with the sheet model, thickness, direction and method.
Can a small bare-sheet sample settle the final laminate curve?
Use it to select the proposed substrate, then include the actual facing, adhesive, seam, edge and release/finishing sequence in a complete component trial. Request the laminate-facing trial with your section and fit criteria.
How should two bending-plywood quotations be compared?
Use the same sheet model/construction, gauge, marked direction, format and finished curve requirement. Include usable blanks, layers, forming/finishing work, quantities and named shipment scope. Compare the complete curved item, with alternatives on separate lines.
Can any sheet bend to the same radius?
Match the bending information to the proposed panel construction and direction. Trial the required radius with your layers, forming process and decorative finish, then retain the complete component record for production.
LET'S PLAN THE SHEETS FOR YOUR NEXT CURVE
Send the section or start with the shape.
Bring the radius, thickness, quantity and destination you know. Open the outline when you are ready to add the forming, layer and finish details.
Open the bending plywood inquiry outline
Component / drawing: [furniture, counter, wrap or interior form; revision].
Minimum order / mix: one container; [project sheets, repeat items or mixed load].
Regular sheet sizes: 1220 × 2440, 1250 × 2500 or 1525 × 3050 mm.
Sizes on request: 1220 × 3050, 1250 × 3660 mm or specified cut panels.
Curve / dimensions: [inside/former/other named reference radius, arc angle, height and tangent sections; layer reference].
Panel / offered model: [required individual gauge; offered nominal/finished tolerance, veneer construction, format and bending information].
Bend direction: [L or W follows the arc; axis and actual material flex arrow on full-sheet and cut-part layout; decorative grain separately].
Layers / support: [layer schedule, finished thickness, former or frame].
Forming process: [adhesive, clamping, curing and release sequence].
Decorative finish: [veneer, laminate or paint; seams, edges and returns].
Sample / review: [model/sample, thickness/direction, trial dimensions/conditioning, method/former, released shape and review timing/positions/fit].
Material file: [actual model and gauge/direction/radius scope, method/criteria and relevant bond/emission information].
Comparable quotes / repeat: [same build-up, usable blanks, process/finish, retained drawing/former/sample, quantities and delivered scope].
Items / packing: [quantities, flat-sheet support, labels and receiving limits].
Delivery: [FOB shipment port or CIF destination port; planned arrival].
Choose the visible surface with the decorative veneer guide, or compare precision plywood requirements for thin cut parts used in a different assembly.