YOUR COLOUR PALETTE, WITH THE CHARACTER OF OAK
Bring the finish you imagine into the furniture you make.
A well-chosen oak finish connects cabinet fronts, furniture and interior panels to the rest of the room. Start with the wood character and colour your customers will see, then carry that reference into the panel and finishing schedule.
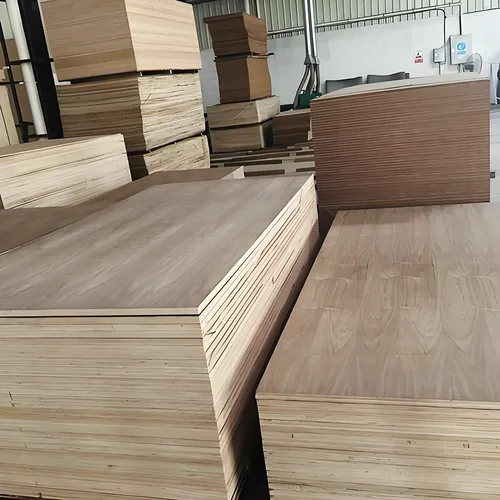
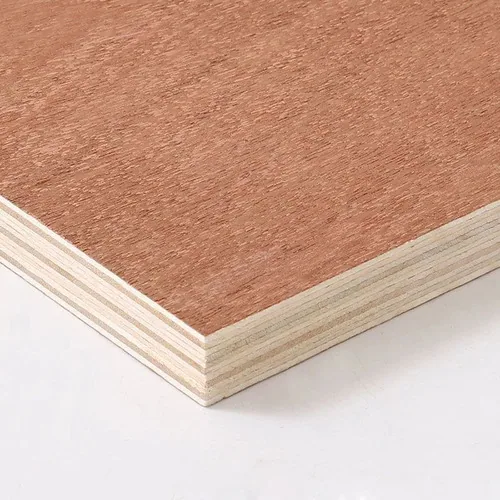
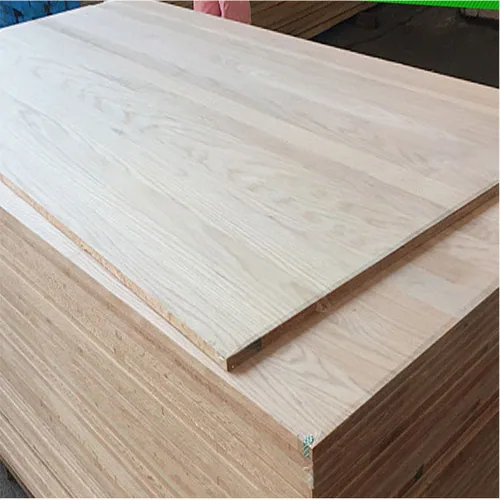
CUZI supplies red oak veneer plywood in 3–30 mm with poplar, birch or eucalyptus cores. Choose unfinished panels for your own finishing process, or stained/coated panels for an agreed finished appearance. Single or double sided faces and veneer matching are available.
Bring us a physical colour reference, a cabinet drawing or a photo of the interior you are developing. Choose the supplied finish with a representative sample of the actual veneer and edge material, then list the panels that need to look right together.
Two supply routes, one complete finish brief.
Both unfinished and stained/coated panels are available. Keep the finishing responsibility explicit on the offer, with the red oak veneer and chosen core identified in either form.
Scroll horizontally to compare all columns.
| Supply / detail | Keep with the selected item | Start your comparison |
|---|---|---|
| Unfinished red oak veneer plywood | Buy the selected veneer and full panel construction for your workshop. Specify supplied sanding/preparation, front/reverse gauges and remaining veneer for your process. Retain the bare reference together with the finished face-edge trial. | Your workshop selects and applies its finishing system. Trial unfinished red oak |
| Stained / coated red oak plywood | Buy against a physical finished master and accepted range. Identify actual stain/topcoat, preparation, included faces/edges, sheen and cure/contact requirements. Record any finishing operation left for your workshop. | Connect each delivered surface to the finished sample. Trial supplied stained / coated oak |
Define colour, grain texture and sheen together
Include a finished target and pieces showing the lighter and darker variation your design accepts. Review the grain and pore appearance at the intended sheen, beside adjoining trim or hardware. Keep the stain and topcoat references with those pieces, so the next item can be compared with the complete finish.
CABINETRY, FURNITURE AND INTERIORS IN ONE PALETTE
Put the closest colour coordination where the eye compares it.
Allocate the closest coordination to adjoining components.
Scroll horizontally to compare all columns.
| Supply / detail | Keep with the selected item | Start your comparison |
|---|---|---|
| One decorative face | Identify the red oak front and its veneer cut/gauge/preparation. Describe the reverse veneer/treatment separately, including its visible area, finish and mounting requirements. | Single-sided describes the decorative arrangement; list the supplied coating surfaces. Trial one visible face |
| Two decorative faces | Specify red oak appearance and finishing scope on both sides. Include grain/matching, colour range and sheen by side, the entire component and actual edge/joint. | Inspect both sides of the selected finished panel. Trial two visible faces |
| Joined face / edge / corner | Put actual solid lipping or banding beside the veneer. Identify the joint, corner, visible repair or routed feature; record preparation and coating sequence on those real materials. | Review the customer-facing detail under project lighting. Trial a finished face-edge corner |
Mark cabinet fronts, drawer fronts and end panels in their final order. For wall elevations, include returns and access doors in the same sight line. Keep separate-room furniture groups identifiable within the palette. Use the numbered grain-oriented cutting list for the matching allocation.
Use natural veneer selection when developing an unstained wood direction. Compare walnut plywood through complete finished samples when the collection calls for a different wood character.
Specifications
Supply specifications
Regular sizes mm · width × length
On request
Other sheet sizes and cut-to-size panels on request.
| Nominal thickness | 3–30 mmDiscuss finished thickness and tolerances → |
|---|---|
| Core / substrate | Poplar, birch or eucalyptus |
| Surface finish | Red oak veneer; unfinished or stained/coated; single or double sided; veneer matching available |
Details for your application
Panel construction and finishing
| Red oak face | Red oak veneer with the cut, face thickness and selected appearance connected to the component. |
|---|---|
| Thickness & core | 3–30 mm panels with poplar, birch or eucalyptus cores. |
| Supply & faces | Unfinished or stained/coated supply; single or double sided, with reverse-side finishing described for the item. |
| Matching & colour | Veneer matching available; physical colour target, finished variation and component sequence specified with the design. |
| Finish & edges | Preparation, stain/topcoat references, sheen and the actual face-edge junction retained with the selected item. |
Choose the panel and the supplied finish in one specification.
State whether you want unfinished red oak faced plywood or a stained/coated item. Connect that choice to the thickness, core and face arrangement, with the finish reference needed for your cabinet or interior project.
- Panel construction
- 3–30 mm; poplar, birch or eucalyptus cores. Add the required bond, tolerances and machining details.
- Supply & faces
- Unfinished or stained/coated panels; single or double sided. Identify the reverse-face finish and veneer thickness.
- Wood & matching
- Red oak veneer with matching available. Include the cut, appearance range, grain arrows and adjoining faces.
- Colour & sheen
- Physical target and accepted variation, stain and topcoat references, grain texture and intended lighting.
- Edges & process
- Edging or solid lipping, corner detail, preparation and finishing sequence on the actual materials.
- Quantity & repeat
- Item and matching-group quantities, selected spares, retained finish references and destination.
Keep nominal panel thickness, front/reverse veneer gauges and the measured finished thickness after the specified coating on separate lines. Request the supplied preparation and remaining veneer after the intended sanding or routed detail. Use the finished-thickness plan for locations, method and component-fit requirements. For supplied stained/coated panels, identify which surfaces are included in the finishing scope. For unfinished panels, describe the workshop process you will use when reviewing the sample.
A FINISH REFERENCE THAT FITS THE WAY YOU BUY
A cabinet run, a wall elevation or the next furniture batch.
Decide which surfaces need to coordinate most closely. Set the sample and appearance range at that scale, then connect the finishing scope to the items you want to order.
Master, accepted range and viewing conditions.
Choose stain colour together with the wood character. A dark or walnut-colour stain still leaves red oak as the veneer identity. Use Walnut Plywood when the actual walnut grain and material are required.
Scroll horizontally to compare all columns.
| Supply / detail | Keep with the selected item | Start your comparison |
|---|---|---|
| Finished master | Retain the selected red oak veneer/cut, actual edging and complete preparation/stain/topcoat record. Give the physical piece an item/reference and identify which sides it represents. | A photograph starts the colour discussion; the actual finished piece carries the order target. Develop the finished master |
| Accepted appearance range | Keep lighter/darker pieces and the grain/figure/repair range accepted under the same system. Mark adjoining fronts, returns and spares on the drawing; identify each retained piece. | Compare proposed material within the selected range. Request the colour-range set |
| Sheen / grain texture / light | Compare the cured finish with adjoining trim/hardware in the intended light and viewing direction. Where numerical colour or gloss is specified, name the measurement method, geometry, reference and acceptance limits in the brief. | Trial the actual surface and pore appearance before choosing the item. Trial sheen and viewing conditions |
Match a cabinet run
Review adjoining fronts and actual edging under one complete finish. Include grain, repairs, corners and the chosen sheen in the sample.
Build the colour referenceColour a wall elevation
Map the faces seen together, including returns and access panels. Give the selected colour range and grain direction a place on the drawing.
Plan the visible groupsRepeat a furniture finish
Keep a finished range with the preparation, coating and construction references. Use the same item record when planning another production mix.
Prepare the next orderCOMPARE OPTIONS
Your selection at a glance
Panel & supply scope
3–30 mm with poplar, birch or eucalyptus cores. Choose unfinished or stained/coated supply, single or double sided, and identify the included finishing work.
Colour & grain
Veneer matching available. Select a physical colour target and finished variation range, with grain direction and adjoining pieces marked on the design.
Finish & edges
Try the actual face and edging under the selected stain and topcoat. Keep preparation, sheen and the finished junction with the item and repeat-order references.
THE WOOD PANEL AND FINISH ON THE SAME ITEM
Give purchasing the complete red oak specification.
Request information for the panel and supplied finish you intend to buy. Include the application, destination and any required product standard with the construction and physical appearance reference.
Keep the panel data beside the finished sample and item schedule. Where the buyer finishes the panel, retain the workshop coating record with the material reference; where a finished panel is supplied, carry the selected finishing scope into the quotation.
Keep a useful file behind each quoted finish.
Scroll horizontally to compare all columns.
| Supply / detail | Keep with the selected item | Start your comparison |
|---|---|---|
| Panel / veneer / preparation | Red oak identity/origin/cut and front/reverse gauges; full core/veneer/bond schedule, supplied preparation, nominal/measured finished dimensions and tolerances. Pair required emission or performance methods/results and model scope with the proposed item. | Include the actual machining and destination requirements. Request the panel and veneer file |
| Selected coating system | Identify the actual stain/topcoat and application information, compatible preparation, included surfaces, coating sequence and drying/cure/contact/packing conditions. Describe separately any work completed by the buyer. | Match the file to the offered finishing scope. Request the coating scope |
| Master / range / repeat lot | Retain finished reference codes, accepted lighter/darker/figure range, sheen/light and any agreed measurement criteria. Keep numbered viewing groups, spares, quoted item and changed process/materials with the next-lot comparison. | Use the same material and process references in purchasing and receiving. Request the finish-reference file |
Use the selected coating's own application information
Trial the finish on representative material before moving to production. As an example, Minwax's stain instructions describe a colour trial before staining and completing that product's finish with a protective topcoat. Follow the instructions for the actual system selected for your item, including preparation, compatibility and drying or cure conditions.
Product data & reports to request
Request a technical data sheet covering:Face/back grade, core species and lay-up, bond, thickness tolerance and the agreed surface finish.Include these specification details:- Red oak veneer identity, cut, face thickness, matching arrangement and reverse-face description.
- Core, nominal panel thickness, dimensional tolerances and required bond or emission information.
- Unfinished or stained/coated supply, included surfaces, preparation, stain/topcoat references and agreed appearance range.
Company documents to view
FSC chain of custody Wood panels · purchase & salesISO 9001 & ISO 14001 Management systems · stated sales activitiesEN 13986 plywood document Non-structural scope · listed modelsView our company certificates alongside the technical data for your selected panel.Furniture & interior panels: what to match
- Technical data
- Face/back grade, core species and lay-up, bond, thickness tolerance and the agreed surface finish.
- Emissions
- For covered hardwood plywood entering the US, request TSCA Title VI certification or applicable exemption documentation, with producer and product identification. For other markets, specify the required emission class and test method. For European furniture and wood-based articles, include the applicable REACH Entry 77 / Appendix 14 emission requirements.
- Sample match
- Connect the data sheet and reports to the proposed construction, thickness and sample reference.
BEFORE YOU ORDER
Ordering information
- Minimum order
- 1 container
- Regular lead time
- 10–15 days
- Samples
- Free samples
- Quotation terms
- FOB / CIF
Sample freight & order notes
- Minimum order: Mixed loads available.
- Regular lead time: Production; shipping time is additional.
- Samples: Buyer pays freight; full credit on a formal order.
- Quotation terms: Name the port in your inquiry.
SEE THE COLOUR ON THE FACE AND EDGE YOU WILL USE
Start with a finish sample your workshop can repeat.
Request a free red oak plywood sample with the panel construction and supply form you need. Share the colour target and explain whether the trial is for a supplied stained/coated panel or your own workshop finish. You pay sample freight, which is credited in full against your formal order.
- Choose the wood rangeReview representative veneer faces with the actual edging or lipping. Identify the grain, natural colour and permitted features your design can use.
- Complete the finish trialPrepare and finish the joined materials with the intended process. Compare the dry finished result, texture and sheen under the project lighting.
- Retain the target and rangeKeep the selected finish with accepted lighter and darker pieces, item references and process notes. Use that set for the quotation and another batch.
Include a repair, corner or routed detail in the trial
Where those features will be visible, finish representative examples with the main face. Compare the edge junction and repaired area after the selected system has dried or cured as specified. Discuss any revised preparation or face selection using a trial piece before applying it to the full quantity.
THE SELECTED FINISH READY FOR RECEIVING
Protect the surface and keep the colour groups clear.
Discuss the packing proposal against the supplied finish. For stained/coated panels, include the selected coating's contact and cure requirements with face separation, label placement and protection against abrasion or pressure marks. For unfinished panels, plan face and edge protection for the material entering your finishing process.
Keep coated-face separation, contact-material compatibility and handling/cure instructions with the chosen system. Use the receiving and storage guide alongside the supplied finish instructions. Label matching groups and selected spare pieces against the item schedule. Check quantities and visible condition on arrival, retaining pack references with the colour and finish record for fabrication or replacement discussions.
Request FOB at the shipment port or CIF at the destination port. Include your destination and receiving requirements with the target arrival date. Regular production is 10–15 days; confirm the schedule for the selected finishing scope, with shipping time additional.
THE FINISH YOUR BUSINESS CAN ORDER AGAIN
Build the container around your selected furniture palette.
Orders start at one container, with mixed loads available. List red oak items by construction, supplied finish, sheet size and quantity. Keep closely coordinated cabinet or wall groups identifiable within the wider product mix.
Cabinet and furniture manufacturers
Choose unfinished panels when the finishing process belongs in your workshop, or discuss a stained/coated item against a finished reference. Retain the selected range with the edging, preparation and component drawing for each colour in the collection.
Interior contractors and panel distributors
Connect the finished reference to the numbered room elevation or stock-item description. Identify adjoining faces, selected spares and any staged installation, with the colour range and finish scope available to the receiving team.
Compare the finishing included in each offer
Include material selection, grain allocation, preparation, included faces and edges, coating work, surface protection and selected spares when comparing quotations. Identify any finishing work left for the workshop so the panel price can be connected to the cost of the usable component.
ONE DARK OAK PALETTE, SEVERAL VIEWING GROUPS
Carry the cabinet colour through the room.
A project combines a bank of doors, a wall return and furniture in separate rooms. Make the first finish trial on the selected red oak face and actual lipping, including a representative corner or repair. Retain a colour target and the finished variation the design welcomes.
Mark the adjoining doors and wall return as one viewing group on the elevation. Give separate furniture items their own selected range within the same palette. Allocate sheets against those positions, with grain arrows and finish references on the cutting list.
Give the next batch the same complete reference
Keep the construction, selected wood range, preparation and coating record with the finished pieces. Identify any changed stain, topcoat, edging or drawing in the new inquiry. Review the proposed finished item against that set when planning a repeat order or replacement.
Give the colour reference a place on the drawing.
Adjoining fronts: number the doors and drawer fronts in the final viewing order, with grain arrows and the retained finished range. Include the end panel and actual edge in the shared group.
Wall return and access door: mark which faces are seen together. Keep the return, access piece, joint and selected spare under their group reference.
Separate-room furniture: record its own selected pieces within the palette, with the same wood, preparation and coating identity. Compare the next proposed lot against the retained range when planning a repeat or replacement.
This is a purchasing-layout illustration. Give your real drawing, quantities and viewing groups their own references.
Discuss your numbered finish groupsA FINISH RECORD FOR THE FIRST ITEM AND THE NEXT BATCH
Keep the colour connected to its wood and process.
Use the worksheet with the physical target and selected range. It links the construction, finishing scope and visible result so the workshop and purchasing team can compare the same item.
| Check | Record during evaluation |
|---|---|
| Veneer & construction | Veneer identity/cut/range, core/full layer schedule, nominal and measured finished panel gauge, actual front/reverse gauges, supplied preparation and remaining veneer for the component process. |
| Supply & finish scope | Unfinished or stained/coated supply; included faces, edges, preparation and finishing responsibility. |
| Colour & sheen | Physical master and lighter/darker/figure sample codes, preparation/stain/topcoat references, sheen/texture, lighting/viewing direction and agreed measurement method/geometry/limits where specified. |
| Face & edge | Actual edging or lipping, joint and corner detail, visible repairs, routed areas and process observations. |
| Layout & batch | Door or wall groups, grain arrows, numbered drawing, batch/item references and repeat-order changes. |
| Packs & spares | Selected spare pieces, finish protection, group labels, received quantities and visible condition. |
Review a colour difference before processing the batch
Compare the veneer, preparation, coating references and finished edge with the retained set. Keep an unfinished offcut with the item record where possible. Discuss the change on a trial piece and update the affected sample or process reference before carrying it into the production quantity.
BEFORE YOU SELECT THE SUPPLIED FINISH
Your stained red oak plywood buying questions.
Can I order unfinished and stained/coated panels?
Yes. CUZI can supply either form. Identify your chosen scope in the inquiry, with the panel construction and, for a finished item, the stain, topcoat and physical appearance reference.
Which thicknesses and cores are available?
The red oak decorative range covers 3–30 mm with poplar, birch or eucalyptus cores. Add the component use, bond and dimensional requirements to the selected construction.
Can I request two visible faces and matching?
Single or double sided faces and veneer matching are available. Mark the visible faces, adjoining components and reverse-side finishing requirements on the drawing.
Which sheet sizes should I put on my schedule?
Regular sizes are 1220 × 2440, 1250 × 2500 and 1525 × 3050 mm. Formats including 1220 × 3050 and 1250 × 3660 mm, other sizes and cut-to-size panels are available on request. Include grain direction with the dimensions.
What colour reference should I send?
Start with a physical finished sample or your preferred colour direction. Select the actual veneer under the intended stain and topcoat, keeping a target and accepted lighter/darker range beside the quoted item.
How do I coordinate the face with solid edging?
Finish the actual materials together in a joint sample. Include the edge, corner, sheen and preparation so their colour relationship can be reviewed in the form your customer will see.
Can stained oak reproduce a walnut appearance?
Compare complete finished samples when choosing the wood palette. Stain colour is one part of the result; the grain and texture also matter. Explore walnut plywood if that wood character is central to the collection.
How should I trial a colour correction?
Use representative trial pieces and the selected finish system's instructions. Keep the face veneer thickness in the finishing specification, and review a revised process before applying it to the production panels.
Are samples free?
Samples are free and buyers pay freight. Sample freight is credited in full against your formal order. Include the panel form, intended finish and component you want to evaluate.
Can these panels be part of a mixed container?
Yes. Minimum orders start at one container, with mixed loads available. Provide quantities by item, keeping the finish references and closely coordinated groups identifiable.
What lead time and quotation terms can I request?
Regular production is 10–15 days. Confirm the schedule for the selected unfinished or stained/coated item; shipping time is additional. FOB and CIF quotations are available with a named shipment or destination port.
Does double-sided mean both faces have the same stain and topcoat?
Describe each side separately: veneer/cut/gauge, visible appearance, stain/topcoat and sheen. Put all supplied surfaces and any buyer finishing work on the offer. Compare both finished faces
How much veneer can my finishing process remove?
Request actual front/reverse gauges and supplied preparation for the proposed item, then discuss the remaining veneer after your intended process. Trial the specific repair or routed detail on representative material. Request gauges and preparation
Can I use a photo or colour code as the final master?
Use it to explain the direction, then choose a physical finished master and accepted range on the actual red oak face and edge. Include sheen, texture, light and any agreed measurement method with that set. Start the physical-master trial
How should purchasing compare two finished-panel offers?
Use the same veneer/core/gauges, prepared surfaces, matching, coating scope, selected range, finishing responsibility, protection, spares and named delivery terms. Record any operation still required to reach the finished component. Quote a comparable finished item
What do I send for a repeat finish or replacement panel?
Send the retained master/range and panel/process codes, numbered location, quantities and any changed coating, material or drawing. Review the proposed next-lot finish against that range, including adjoining components and selected spares. Plan the next finish lot
Will the same stain look identical on every red oak sheet?
Wood character and preparation influence the finished result. Retain a colour target and an accepted variation range on the selected veneer, with the actual edging, stain, topcoat and process references for the item.
Which guides can help me choose this panel?
For this product, read Natural veneer approval: build an appearance range board. Use the panel comparison to compare your shortlist before requesting samples or a quotation.
LET'S BRING YOUR FINISH INTO THE NEXT ORDER
Send the colour reference or start with your first item.
Your supply form, thickness, quantity and destination are enough to begin. Open the outline when you are ready to add the colour range, finishing process and adjoining parts.
Open the stained red oak plywood inquiry outline
I would like a quotation for Stained Red Oak Plywood.

Application / destination:
Thickness / sheet or finished part size:
Red oak veneer / stain / sheen / appearance sample:
Core / bond / visible faces / edges:
Machining and finishing needed:
Quantity / mixed-load items / spares:
Samples or product documents needed:
Packing / FOB or CIF port / required date:
Compare natural veneer selection or the allocation approach for walnut furniture. Use the same component, edge and intended finish when developing the wood palette.