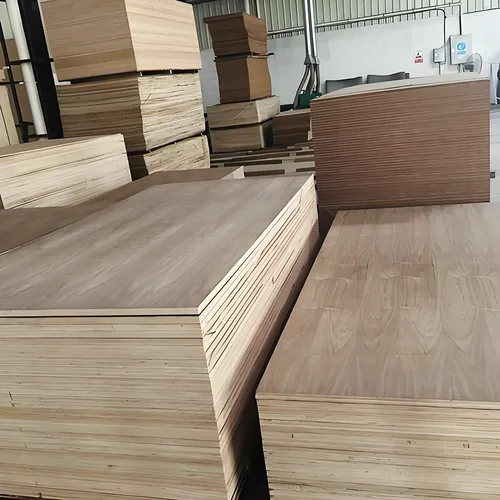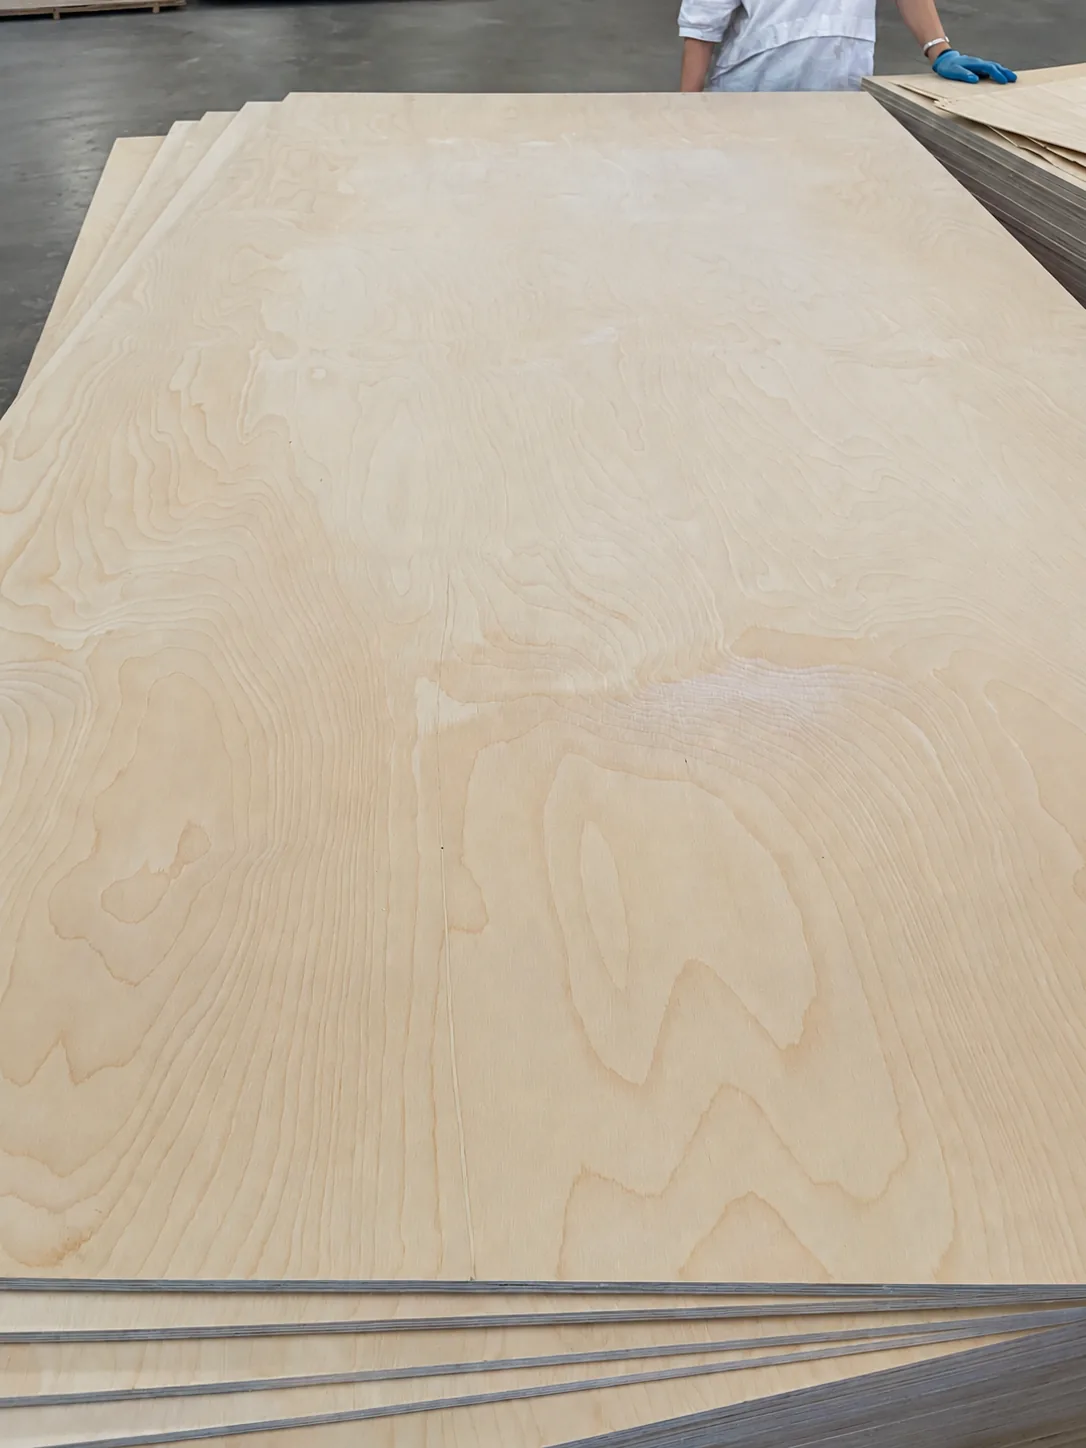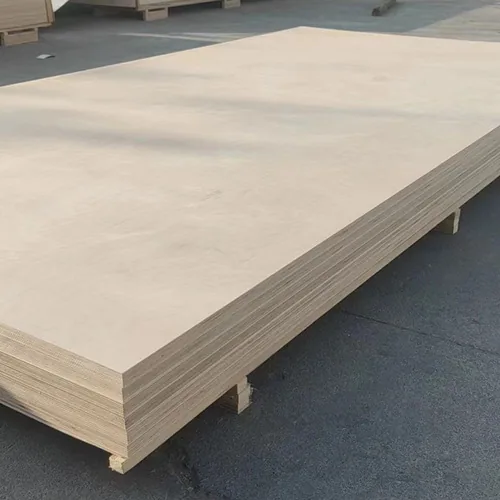
REAL WOOD CHARACTER FOR THE ROOMS YOU CREATE
Give your interior a wood palette of its own.
A natural wood face brings grain and colour into the design of furniture, cabinet fronts and wall panels. Choose the character you want people to see, then carry it through the adjoining materials and finished components.
CUZI's natural veneer range includes red oak, walnut, beech, sapele, bintangor and okoume. Panels are available in 3–30 mm with poplar, birch or eucalyptus cores, single or double sided, with veneer matching available.
Bring us an interior reference, a furniture drawing or the wood direction you have in mind. Start with free samples to compare beside your flooring, edging and hardware, then plan the selected panels into your next mixed container.
Natural grain or a designed wood pattern?
Choose natural wood for its individual grain and character, or compare a reconstituted wood pattern for a planned design direction. Reconstituted veneer is wood recomposed into a decorative pattern; specify its constituent material as well as the pattern name. Keep the selected type explicit in the inquiry and quotation.
Scroll horizontally to compare all columns.
| Face type | What belongs on the offer | Compare finished samples |
|---|---|---|
| Natural wood veneer | Name the actual species and offered origin/cut, with representative grain, colour, features and repairs. Select a physical range across faces that will be viewed together. | Use the intended coating and project light with the target and its acceptable range. Request a natural wood range |
| Reconstituted wood veneer | Name the offered pattern code, constituent wood, veneer gauge and lot. The decorative pattern and the wood used to make it are separate item descriptions. | Compare the finished pattern master and lot range beside the same adjoining materials. Request a reconstituted pattern trial |
For the full decorative panel range and leaf-matching layouts, visit Fancy Plywood. This page helps you choose the veneer type, finished colour range and material references that will carry through your room or repeat furniture collection.
Choose a range of character you want to keep
Put the target beside representative lighter, darker and more figured faces. Select the variation that belongs in your design, including visible features and repairs. Use that finished range to discuss adjoining groups and separate furniture pieces, with the intended coating and lighting kept in the comparison.
FURNITURE, CABINETRY AND VISIBLE INTERIOR WALLS
Let the wood character work at the scale of the design.
Compare the finished veneer appearance.
These natural veneer options use the confirmed 3–30 mm panel range with poplar, birch or eucalyptus cores. Request the actual species/cut, front/reverse veneer gauges and supplied preparation with each item. For a reconstituted alternative, use the offered pattern code and constituent wood instead of inferring species from its appearance.
Scroll horizontally to compare all columns.
| Natural face | What to put beside the sample | Start the comparison |
|---|---|---|
| Red oak | Compare the offered cut, pore/figure and your stain or clear finish beside flooring and solid trim. Keep the named natural species separate from the inner core. | Compare natural red oak Explore red oak plywood |
| Walnut | Select the lighter/darker and figured range you want on adjoining furniture faces; include the actual edging. Keep the named natural species separate from the inner core. | Compare natural walnut Explore walnut plywood |
| Beech | Review the proposed species/cut and finished colour on cabinet fronts, dividers and two-sided parts. Keep the named natural species separate from the inner core. | Compare natural beech Explore beech plywood |
| Sapele | Compare the offered figure under the intended coating, light and orientation with neighbouring faces. Keep the named natural species separate from the inner core. | Compare natural sapele Explore sapele plywood |
| Bintangor | Connect visible face/back features and repairs to the finished furniture component and edging. Keep the named natural species separate from the inner core. | Compare natural bintangor Explore bintangor plywood |
| Okoume | Compare the offered face range and preparation on the actual furniture or interior detail. Keep the named natural species separate from the inner core. | Compare natural okoume Explore okoume plywood |
| Cabinet fronts and wall elevations | Group surfaces seen together, with grain direction and panel sequence on the drawing. Compare the selected finished range across that group. |
|---|---|
| Furniture and open shelving | Identify both viewing faces and the exposed edges. Include the actual edging, reverse face and complete furniture detail in the sample trial. |
| Coordinated interior palettes | Compare the wood alongside flooring, painted surfaces, hardware and trim under the intended light. Connect that physical palette to each panel item. |
Explore beech-faced joinery for a defined light wood direction or walnut plywood for a different furniture palette. The veneer sequence guide helps organise adjoining decorative panels.
Specifications
Supply specifications
Regular sizes mm · width × length
On request
Other sheet sizes and cut-to-size panels on request.
| Nominal thickness | 3–30 mmDiscuss finished thickness and tolerances → |
|---|---|
| Core / substrate | Poplar, birch or eucalyptus |
| Surface finish | Red oak, walnut, beech, sapele, bintangor or okoume veneers; single or double sided; veneer matching available |
Details for your application
Panel construction and finishing
| Natural wood faces | Red oak, walnut, beech, sapele, bintangor or okoume veneers. |
|---|---|
| Thickness & core | 3–30 mm; poplar, birch or eucalyptus cores selected for the component. |
| Faces & matching | Single or double sided; veneer matching available for adjoining panels. |
| Palette & finish | Finished wood range compared with the actual adjoining materials, edging and intended light. |
| Layout & repeat | Grain direction, panel groups and selected spares connected to the numbered design and repeat-order reference. |
Connect the wood you see to the panel you need.
Choose the visible veneer first, then the thickness and construction for your component. Add the face arrangement and finishing details so the selected wood direction becomes a practical order.
- Veneer options
- Red oak, walnut, beech, sapele, bintangor or okoume. Specify the species and physical appearance range.
- Thickness & core
- 3–30 mm with poplar, birch or eucalyptus cores. Include the selected thickness, bond and dimensional tolerances.
- Visible faces
- Single or double sided. Identify the reverse face, open-door positions and exposed-edge requirements.
- Grain & layout
- Veneer matching available. Add the cut, grain arrows, adjoining groups and numbered panel positions.
- Finish & edges
- Face veneer thickness, intended preparation and coating, sheen, edging or lipping and joined sample.
- Quantity & repeat
- Item quantities, selected spares, phased requirements and retained palette and construction references.
Keep the veneer species and internal core on the same item description. For workshop finishing, request the actual front and reverse veneer gauges, supplied preparation and remaining veneer after the intended sanding/routing process. Total 3–30 mm panel thickness is specified separately. Use the thickness measurement plan with the offered construction. Identify any supplied finishing work separately in your inquiry and quotation.
CHOOSE THE NEXT STEP FOR YOUR NATURAL WOOD PROJECT
A room palette, a continuous elevation or a furniture range.
Begin with the part of the design that drives the selection. The same wood can be reviewed as a complete room palette, a group of adjoining faces or a repeat furniture item.
Keep the room palette connected to its viewing groups.
Choose the veneer range, leaf matching and coating together. Review adjoining pieces as a group, and give separate furniture pieces or later phases their own colour and finish references.
Scroll horizontally to compare all columns.
| Viewing scope | Retain with the panel schedule | Request the project trial |
|---|---|---|
| Adjoining fronts / wall group | Target plus agreed lighter/darker/figured range, numbered positions, grain arrows and finish/light references. Keep each viewing group and its selected spares identifiable. | Trial neighbouring finished faces as a group. Request an adjoining-face range |
| Two visible faces / edges | Front and reverse identity, appearance and finish; door-open sight lines, shelf undersides, actual lipping/banding and hardware. Quote each viewing surface. | Review the complete two-sided component. Request a two-sided palette trial |
| Pattern-led repeat collection | Pattern code and constituent wood, finished master, offered lot range, drawing revision and production process. Compare a proposed new lot beside the retained reference. | Carry the selected pattern and coating into the next trial. Request a repeat-pattern trial |
Build the wood palette
Compare finished veneer samples with flooring, paint and actual edging. Choose the colour and grain range that belongs beside those materials.
Start with a palette samplePlan adjoining panels
Map the faces seen together on the elevation. Mark their grain direction, matching scope and positions before developing the cutting list.
Plan the panel sequenceRepeat a furniture item
Keep the selected wood range, construction and complete finish with the component drawing. Use that reference when preparing another order.
Prepare the next furniture batchCOMPARE OPTIONS
Your selection at a glance
Wood & palette
Choose red oak, walnut, beech, sapele, bintangor or okoume. Review the finished wood range beside your actual flooring, trim and edging.
Panel & faces
3–30 mm with poplar, birch or eucalyptus cores. Choose single or double sided around the component and its visible surfaces.
Matching & repeat
Veneer matching available. Connect the selected character range, grain direction and adjoining groups to the numbered design and next order.
THE WOOD PALETTE AND MATERIAL DATA TOGETHER
Give purchasing a named veneer and a complete construction.
Request technical information for the proposed natural veneer panel. Include the destination, component use and any material, bond or emission standard required by the project.
Connect the visible wood with the construction behind it.
Scroll horizontally to compare all columns.
| Information | Match to the proposed item | Ask for the working data |
|---|---|---|
| Face identity / gauge | Natural species/origin/cut and range, or reconstructed pattern/constituent wood/lot; front/reverse gauges, supplied preparation and physical sample references. | Name the chosen face type and actual pattern/species. Request veneer identity and gauges |
| Panel construction / methods | Full inner species/layer/bond schedule, nominal and measured finished thickness/tolerances, format and required material/emission method/results for the proposed model. | Keep destination and finished-assembly requirements with the data. Request the complete panel file |
| Finished palette / lot record | Coating/sheen and process, actual edging and adjoining materials, target/range board or pattern master, lot references and numbered viewing groups. | Review the offered batch against the same finished reference. Request finishing and lot information |
Keep the technical data with the selected physical range. A species name helps identify the wood direction; the construction and component requirements give your team the information needed for machining, assembly and the intended installation.
ALPI’s wood and processing overview illustrates the general reconstituted-wood approach. Request the offered CUZI pattern, constituent wood and panel data with your project; compare its finished sample with the natural veneer range.
Try matching methods with your selected veneer
Book matching turns alternate veneer leaves to create a paired pattern; slip matching lays the leaves in the same orientation for a repeated grain direction. Columbia Forest Products' veneer illustrations explain these arrangements. Use the proposed material and project layout to select the matching method with your inquiry.
Product data & reports to request
Request a technical data sheet covering:Face/back grade, core species and lay-up, bond, thickness tolerance and the agreed surface finish.Include these specification details:- Actual veneer species, cut, face thickness, appearance range, matching and reverse-face description.
- Core species and lay-up, nominal panel thickness, dimensional tolerances and required bond or emission information.
- Surface preparation, agreed supplied finish and the palette, edge and component references used in the sample trial.
Company documents to view
FSC chain of custody Wood panels · purchase & salesISO 9001 & ISO 14001 Management systems · stated sales activitiesEN 13986 plywood document Non-structural scope · listed modelsView our company certificates alongside the technical data for your selected panel.Furniture & interior panels: what to match
- Technical data
- Face/back grade, core species and lay-up, bond, thickness tolerance and the agreed surface finish.
- Emissions
- For covered hardwood plywood entering the US, request TSCA Title VI certification or applicable exemption documentation, with producer and product identification. For other markets, specify the required emission class and test method. For European furniture and wood-based articles, include the applicable REACH Entry 77 / Appendix 14 emission requirements.
- Sample match
- Connect the data sheet and reports to the proposed construction, thickness and sample reference.
BEFORE YOU ORDER
Ordering information
- Minimum order
- 1 container
- Regular lead time
- 10–15 days
- Samples
- Free samples
- Quotation terms
- FOB / CIF
Sample freight & order notes
- Minimum order: Mixed loads available.
- Regular lead time: Production; shipping time is additional.
- Samples: Buyer pays freight; full credit on a formal order.
- Quotation terms: Name the port in your inquiry.
FROM YOUR INTERIOR IDEA TO A FINISHED WOOD RANGE
Start with free samples and the materials they will sit beside.
Tell us which veneers you want to compare, the thickness and construction, and your delivery country. Samples are free; you pay courier freight, which is credited in full against your formal order.
- Choose the wood directionCompare representative faces, grain and colour with your interior references. Include the actual lipping or edge band and reverse face where they remain visible.
- Complete the paletteApply the intended finish to the trial and place it beside the adjoining flooring, paint or trim. Review the group under the project lighting and orientation.
- Set the panel groupsKeep the selected target and variation range with the numbered design. Identify adjoining faces, broader character groups and selected spare material.
Include the furniture detail in the next trial
When the design includes a routed edge, hinge recess or two-sided shelf, try that detail on the proposed construction with your production process. Review the finished component and actual hardware beside the chosen wood range before settling the item specification.
SELECTED PANEL GROUPS READY FOR RECEIVING
Protect the faces and make the layout easy to follow.
Discuss face and edge protection, panel direction and group labels for the proposed veneer order. Match the pack identification to the numbered elevation or item schedule, with selected spare panels clearly identified.
Regular production guidance is 10–15 days; shipping time is additional. Request FOB with the shipment port or CIF with the destination port, and share your target receiving date. Agree the item and delivery schedule with the quotation.
Include your destination and receiving requirements, unloading method and any pack-size or weight limits. Keep the palette and range reference available when the received panels are sorted for cutting. Use the physical veneer range guide, the panel group/label schedule and the storage and acclimatisation guide with the received material.
Connect receiving observations to the right panel group
Check quantities and labels against the schedule, then record the visible pack and face condition before processing. Use the pack and group references with photographs or questions so the selected wood range can be compared with the affected items.
YOUR SELECTED WOOD PALETTE IN THE NEXT CONTAINER
Order the panel mix your business actually uses.
Orders start at one container, with mixed loads available. Combine your chosen veneer items with other plywood or MDF, listing the thickness, core, faces, size and quantity for each item.
Furniture and cabinet manufacturers
Build the selected palette around repeat furniture items. Retain the physical wood range, joined finish sample and construction with each drawing. Identify any changed veneer, core, edging or finish in the next inquiry so the new offer follows the component you intend to make.
Interior buyers and panel distributors
Connect closely coordinated groups to their room or elevation. Plan staged requirements and selected spares with the full project quantities, then keep those references identifiable through packing, receiving and cutting.
Match the selection effort to visible groups
List adjoining cabinet fronts and continuous walls separately from pieces viewed in different rooms. Describe the character range allowed in each group. Compare quotations using the same layout and selection scope so the offered material relates to the usable panels in your project.
ONE WOOD DIRECTION ACROSS A WALL AND OPEN FURNITURE
Carry the palette through the room without losing its character.
A project combines a continuous wall with open shelves and separate furniture pieces. Begin by arranging several finished veneer samples beside the flooring and painted surfaces. Select a target and a natural variation range that belong in the room.
Mark the continuous wall as one viewing group, with panel positions and grain arrows. Identify both visible shelf faces and the edging shown against the wall. Give the separate furniture items their own range within the selected palette, with the component construction and finish on each drawing.
Quote the project by those groups and quantities. Keep the finished range, palette references and selected spares connected to the panel schedule for fabrication, later phases and repeat purchases.
Evaluate the complete palette when the colour needs adjusting
Review the wood beside the actual neighbours under the project light. Compare a revised finish or selected veneer range on a trial piece, then update the affected palette and item reference. Keep the proposed construction and finish with that choice.
Give each viewing group its own reference.
In an illustrative room schedule, W01–W03 are three neighbouring wall panels, F01 is a separate furniture item and S01 is a selected spare for the wall group. Review W01–W03 together against the finished range; specify F01 by its own visible faces and edging. Give S01 the same group reference in the packing schedule.
For a later phase, compare the new veneer or reconstituted batch with your saved finished sample and the adjoining installed panels. Include the new quantities and matching arrangement in the quotation.
Plan your groups and later phasesONE REFERENCE FOR DESIGN, PURCHASING AND THE WORKSHOP
Keep the wood range connected to its place in the project.
Use this worksheet with the finished palette and panel layout. It links the natural character you selected to the construction, component and group quantities you plan to buy.
| Check | Record during evaluation |
|---|---|
| Wood identity | Actual species, veneer cut, face thickness, reverse face and selected panel construction. |
| Character range | Finished target, lighter/darker and figured faces, permitted features and repairs. |
| Finished palette | Coating, sheen, adjoining materials, actual edging, viewing light and orientation. |
| Matching & layout | Matching arrangement, grain arrows, numbered elevations and groups seen together. |
| Component trial | Machining, hardware, joints, finished dimensions and observations on the selected construction. |
| Phases & repeat | Group quantities, selected spares, pack labels, item references and changes for the next batch. |
Review the grouping when a panel looks out of place
Compare the affected face with the selected range, grain direction and intended neighbours. Review the panel position as well as its individual appearance. Connect any revised selection or allocation to the drawing and item reference before carrying it into the full project.
YOUR NATURAL VENEER BUYING QUESTIONS
Choose the wood direction and the next step with confidence.
Which wood veneers can I choose?
The confirmed range includes red oak, walnut, beech, sapele, bintangor and okoume. Name the species and compare representative finished samples with the adjoining materials in your project.
Which thicknesses and cores are available?
Panels are available in 3–30 mm with poplar, birch or eucalyptus cores. Specify the selected construction and tolerances for the component, with the required bond and destination in the inquiry.
Can I order two visible faces and matching?
Single and double sided panels are available, with veneer matching. Mark the viewing surfaces and adjoining groups, and confirm the matching arrangement for the proposed wood and layout.
Which sheet sizes should I put on the schedule?
Start the veneer layout with regular sheets of 1220 × 2440, 1250 × 2500 or 1525 × 3050 mm. Request formats including 1220 × 3050 and 1250 × 3660 mm, or specified cut components, when developing larger elevations. Connect the chosen format to grain direction and the panel cutting plan.
What does natural describe in the offer?
Here it describes the wood veneer face and its grain and colour character. Specify the surface preparation, any supplied coating, core and bond separately, with product documents for your required emission standard.
How should I compare the wood with flooring and trim?
Use physical finished samples beside the actual adjoining materials under the project light. Include your edging and select a target with the variation range you want the room or furniture to carry.
How do I plan a continuous wall?
Provide a numbered elevation, grain arrows and the groups seen together. Select the matching arrangement and appearance range through the proposed veneer, and keep those references with the cutting and packing schedule.
Which page helps with decorative matching?
The fancy plywood guide covers matching and panel sequence. Compare walnut plywood or beech-faced joinery for defined furniture wood directions; discuss teak-faced panels as a separate decorative inquiry.
How can I request samples?
Share the veneers, construction, intended use and delivery country. Samples are free; you pay courier freight, which is credited in full against your formal order. Include a colour or interior reference when you have one.
Can natural veneer items go in a mixed load?
Yes. The minimum order is one container, with mixed loads available. List quantities by item and identify any selected matching groups, staged requirements and spare panels.
How do I prepare a repeat order?
Use the retained finished range, construction and item drawings. Name the FOB or CIF port, quantities and target receiving date, and identify any changed wood selection, finish or layout in the new inquiry.
How do natural and reconstituted veneers differ in the offer?
For natural veneer, name the actual wood species/cut and chosen physical character range. For reconstituted veneer, name the pattern code, constituent wood and proposed lot range. Compare both finished face types beside the same project materials.
Will a new lot reproduce the previous room palette exactly?
Use the retained finished target/range or pattern master with the original coating and drawing. Compare the proposed lot beside the adjoining material, then quote the selection scope and new group quantities. Prepare the repeat inquiry with changes and phased requirements.
How much veneer can my workshop sand or route?
Ask for the veneer schedule and preparation, then try your machining or sanding on the proposed construction. Check the veneer left after processing so the finished face meets your needs.
Can a pattern name describe the constituent wood or core?
The pattern is a decorative reference. Record the actual constituent wood of a reconstituted veneer and the plywood’s inner species/layer schedule separately. Request the item’s material file, including the method/results needed for its destination.
Should my spare panels be selected with the main viewing group?
Identify the spare’s intended wall, front or furniture group and compare it with that finished range. Label it separately while retaining the group and lot references. Include spares in the phase schedule with the complete quantities.
Will natural wood veneer look identical on every sheet?
Wood grain and colour vary across veneer faces. Select a physical finished range and matching arrangement for the groups seen together, with grain direction and panel positions on the design.
Which guides can help me choose this panel?
For this product, read Natural veneer approval: build an appearance range board or Veneer panel sequence: labels from cutting to installation. Use the panel comparison to compare your shortlist before requesting samples or a quotation.
LET'S TURN YOUR WOOD PALETTE INTO THE NEXT ORDER
Send your interior idea or the panel list you already have.
Start with the wood direction, thickness, quantity and destination. Add the physical palette or numbered layout when you are ready to develop the finish and matching scope.
Open the natural plywood inquiry outline
I would like a quotation for Natural Plywood.

Application / destination:
Thickness / sheet or finished part size:
Natural veneer or reconstituted pattern / appearance sample:
Core / bond / visible faces:
Matching / edges / finish:
Quantity / mixed-load items / spares:
Samples or product documents needed:
Packing / FOB or CIF port / required date:
Explore beech-faced joinery, teak-faced panels or the veneer sequence guide with the same design and finish references.