On this page
BUILD THE ORDER FROM YOUR PARTS AND STOCK LIST
The useful sheet size is the one your business can turn into finished parts.
CUZI's regular plywood formats are 1220 × 2440 mm, 1250 × 2500 mm and 1525 × 3050 mm. Formats such as 1220 × 3050 mm and 1250 × 3660 mm are available on request. Choose the sheet alongside the face, core, thickness and quantities your workshop or customers need.
Start with the finished component or stock item, check the cutting and handling plan, then request the panel construction and dimensions together. A clear item schedule helps you compare offers, build a mixed container and keep the selected material on the repeat order.
A sheet dimension is most useful when it links three stages: the raw board your supplier packs, the cut blank your workshop machines and the finished part your customer receives. Identify the controlled dimension and quantity at each stage so the material list, tooling and delivery follow the same drawing.
Regular plywood sheet sizes and longer formats on request.
Scroll horizontally to compare all columns.
| Sheet size | Supply route | Area per sheet |
|---|---|---|
| 1220 × 2440 mm | Regular | 2.9768 m² |
| 1250 × 2500 mm | Regular | 3.1250 m² |
| 1525 × 3050 mm | Regular | 4.65125 m² |
| 1220 × 3050 mm | On request | 3.7210 m² |
| 1250 × 3660 mm | On request | 4.5750 m² |
For general furniture and fabrication, use the commercial plywood range to choose the face and inner construction. For a specified birch face or birch-core construction, use the birch plywood route with the required grade, thickness and format.
Send other requested sizes with the drawing and quantity. Specialised floor, overlaid or project panels follow their own construction and finished-dimension requirements. The quotation brings the selected format, board and production scope together.
Choose the construction alongside the format.
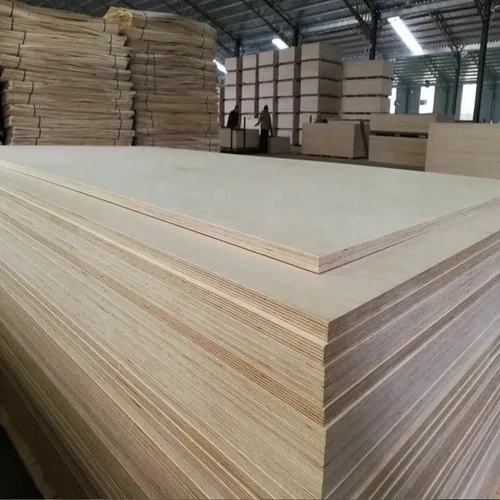
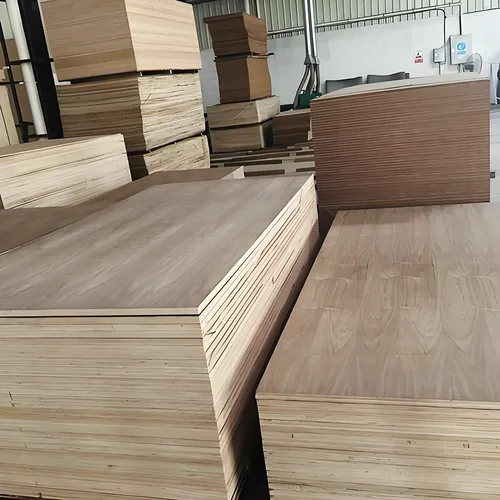
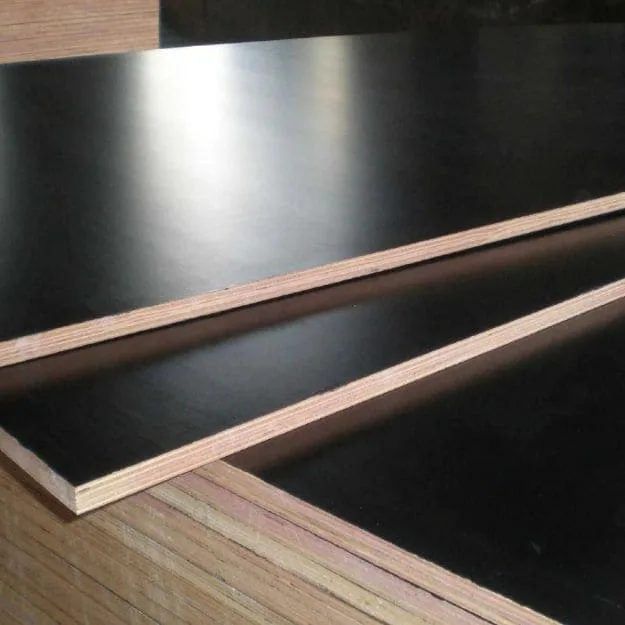
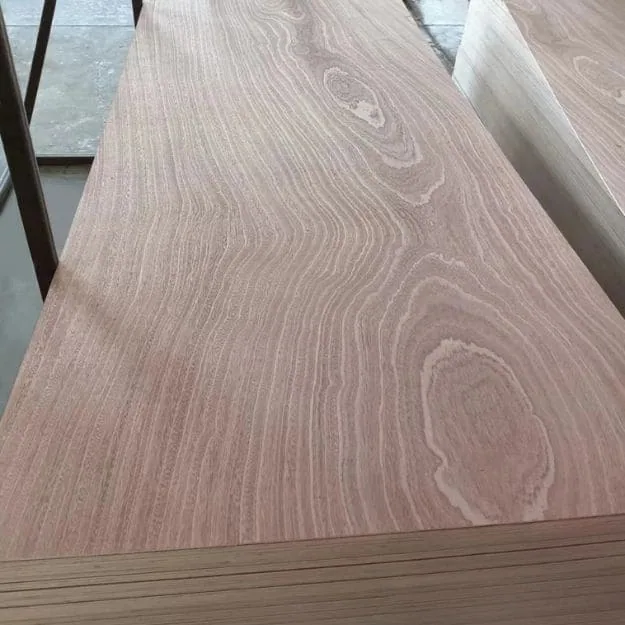
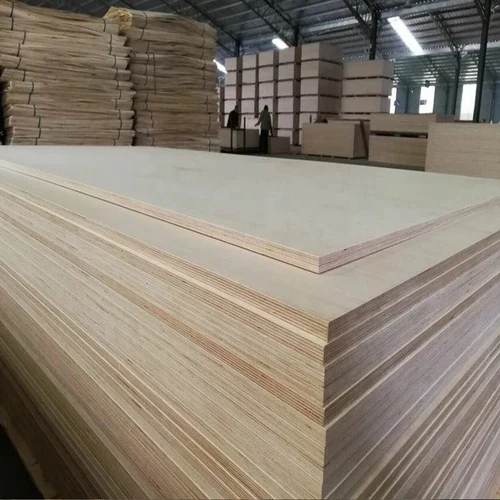
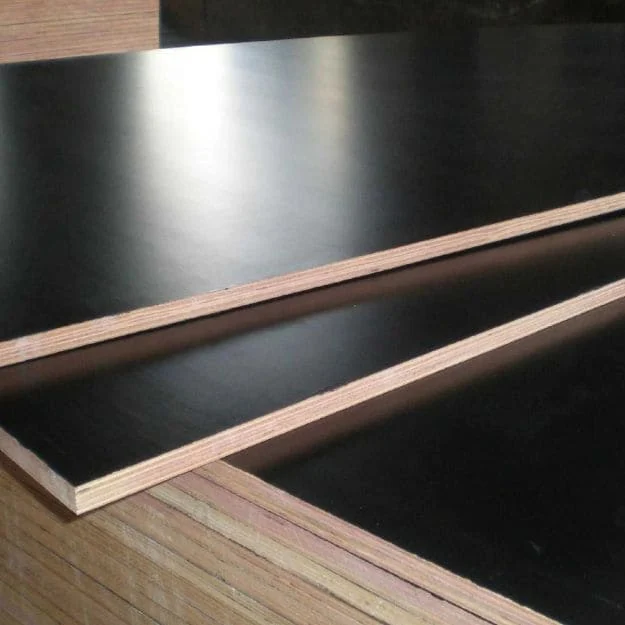
The photographs show uncoated and film-faced plywood with their veneer-layer edges visible. The broad face, reverse and internal construction belong with the dimensional item. A requested sheet size does not identify its core, bond or surface arrangement.
For a repeat stock item, retain the exact width/length, face/back grade, inner species and lay-up, bond and required documents under one code. For a new larger format, ask for the same construction details as the smaller alternative instead of assuming that only the dimensions change.
Plywood thickness ranges belong to the product construction.
Scroll horizontally to compare all columns.
| Product route | Nominal thickness | Put beside the dimension |
|---|---|---|
| Commercial plywood / birch plywood | 3–30 mm | Face / back, poplar, birch or eucalyptus core; BB/CC or C/D; E0 / E1 option and method. |
| Film faced plywood | 4–30 mm | Poplar, birch, eucalyptus or mixed core; film colour/weight and front/reverse. |
| Shuttering plywood | 9–30 mm | Core, bond, film and panel layout for the forming system. |
| Anti-slip plywood | 9–35 mm | Core, square/rice-grain/hexagonal/mesh texture, colour and smooth film-faced reverse. |
| Fire-retardant plywood | 6–30 mm | Poplar, eucalyptus or Okoume core; Okoume/eucalyptus faces; required fire test and documents. |
| Teak veneer plywood | 3–9 mm | Natural or engineered teak, single/double face and veneer matching. |
18 mm is within the commercial, birch, film, shuttering, anti-slip and FR ranges listed here. Select the construction for the use and finish, then discuss the supporting data for that item. Thickness is one field in the complete specification.
For a structural, marine or other design-specific requirement, send the product designation, drawing and required properties through the relevant product route. Keep the designer's material requirement with the thickness and finished component.
Keep the finished gauge and the assembly detail connected.
For a coated or overlaid route, define whether the dimension refers to the plywood substrate or the complete supplied board. For a prepared part, retain the final gauge and the permitted variation at the joint, recess or fitting. Include further sanding or finishing your workshop plans to perform.
For a loaded assembly, carry the responsible design requirement, supports and veneer direction with the proposed gauge. A thickness lying within a supply range helps start an inquiry; the relevant panel data and finished component determine the selection for that duty.
4×8 and 5×10 plywood: use the stated metric dimensions in the order.
1220 × 2440 mm is close to a 4×8 ft reference, and 1525 × 3050 mm is close to a 5×10 ft reference. The NIST length-unit guidance gives exactly 25.4 mm per inch. Therefore 4×8 ft converts to 1219.2 × 2438.4 mm, while 5×10 ft converts to 1524 × 3048 mm.
Scroll horizontally to compare all columns.
| CUZI metric format | Approximate inches | Buying reference |
|---|---|---|
| 1220 × 2440 mm | 48.03 × 96.06 in | Close to 4×8 ft; order the stated metric size. |
| 1250 × 2500 mm | 49.21 × 98.43 in | A distinct metric format; use it in the cut plan. |
| 1525 × 3050 mm | 60.04 × 120.08 in | Close to 5×10 ft; order the stated metric size. |
The same care applies to thickness: 3/4 in converts to 19.05 mm, while 18 mm converts to approximately 0.7087 in. Reconcile the dimension your drawing requires with the proposed panel before fixing a slot, joint or hardware pocket.
Keep both units on a converted drawing where your production team uses them. State the controlling dimension and agreed tolerance, so the inquiry, tooling and receiving checks follow the same requirement.
Keep one controlling unit in the cutting record.
If the original drawing uses inches, preserve its specified dimensions and show the metric conversion beside them. Mark the controlling unit and accepted tolerance before preparing a metric cut list. A rounded trade-size reference should not become the only dimension at a fitted feature.
Use the same unit rule on the raw sheet, cut blank and final part records. This helps avoid a 4×8 reference being interpreted as an exact cut size when the order specifies 1220 × 2440 mm, or an 18 mm board being treated as exactly ¾ inch.
Nominal size, measured size and acceptable variation each need a place.
Use the nominal dimensions to identify the item and plan its geometry. Ask for the offered finished dimensions and tolerances with the panel construction. For receiving, agree the measurement method, locations and conditions, and retain the readings with the item reference.
BSI lists BS EN 315:2000 as the plywood dimensional-tolerance standard. If your purchase specifies that standard or another scheme, name the edition and required scope in the order, then review the supplier's proposed dimensional information.
For a tight cabinet joint, identify the fitted feature and its required clearance alongside the board tolerance. For an overlaid panel, specify the finished overall thickness and surface arrangement. The plywood thickness measurement guide helps prepare the detailed receiving and component checks.
Also include length, width, squareness and the cut edge where they affect the assembly. Tie the material measurements to a working sample, drawing revision and finished-part trial before repeating the production item.
Agree how the receiving check will be made.
Retain the item/pack identity, measuring positions, instrument, conditions and readings with the agreed method. Separate the nominal panel description from its measured size and the limits accepted for the supplied stage. Include flatness or squareness where it affects your machinery or assembly.
For prepared parts, show the datum used for holes and edge features. A coordinate measured from the completed banded edge can differ from one measured on the cut blank. Keep the supplied stage and drawing issue visible when requesting cutting or machining.
COMPARE OUTPUT FROM A DRAWN LAYOUT
A larger sheet can change the number of usable parts.
Consider 700 × 490 mm rectangular parts with grain fixed along the 700 mm direction. For this planning example, assume 10 mm trim at every sheet edge and a 3 mm kerf between adjacent parts. The fixed-direction grids shown below give one way to compare the three regular formats.
Illustrative cutting plan with assumed parts, kerf and trim. Confirm your machine layout, face quality and accepted-part output for the actual order.
Scroll horizontally to compare all columns.
| Sheet format | Usable dimensions after trim / grid | Parts and area yield |
|---|---|---|
| 1220 × 2440 mm | 1200 × 2420 mm; 2 across × 3 along. | 6 parts; 2.058 m² finished area; 69.13% of the original sheet. |
| 1250 × 2500 mm | 1230 × 2480 mm; 2 across × 3 along. | 6 parts; 2.058 m² finished area; 65.86% of the original sheet. |
| 1525 × 3050 mm | 1505 × 3030 mm; 3 across × 4 along. | 12 parts; 4.116 m² finished area; 88.49% of the original sheet. |
The larger grid uses 3 × 490 + 2 × 3 = 1476 mm across and 4 × 700 + 3 × 3 = 2809 mm along. Both fit within the assumed 1505 × 3030 mm usable area. For the smaller grids, the equivalent dimensions are 983 × 2106 mm.
These are comparisons of the shown grids. A different part mix, rotation rule, machine strategy or reusable offcut can change the outcome. Evaluate the panel price alongside accepted parts, cutting work, handling and usable remainder. Our cutting-list guide helps define the layout your production team will actually use.
Round the sheet count up to cover the part list.
Apply the shown grids to a target of 306 rectangular parts, before any rejected pieces. Divide the target by useful parts per sheet and round up. Keep reserve or trial allowance as a separate input rather than hiding it inside the nominal board area.
Scroll horizontally to compare all columns.
| Format | Sheets / available parts | Purchased nominal area |
|---|---|---|
| 1220 × 2440 mm | 51 sheets / 306 parts | 151.8168 m² |
| 1250 × 2500 mm | 51 sheets / 306 parts | 159.3750 m² |
| 1525 × 3050 mm | 26 sheets / 312 parts | 120.9325 m² |
The larger grid leaves six more parts than the stated target. Identify whether those parts are useful reserve and what offcuts can be recovered. Keep the grid assumptions, face-quality exclusions and actual accepted output with the comparison; these layouts do not claim an optimum nesting solution.
Compare the price unit with the same target quantity.
For this exact geometry, the larger format buys 120.9325 m² against 151.8168 m² in the 1220 × 2440 route. At otherwise equal raw-panel scope, its per-m² price can be about 25.54% higher before the raw-sheet bill becomes equal. That is a calculated break-even ratio, not a CUZI price or a saving promise.
Add the actual cutting, handling, finish and rejected-part costs before selecting the route. If the larger sheet needs a different machine sequence or pack arrangement, include those changes with the quotation. Compare the cost of reaching the required accepted quantity, not just a sheet-price headline.
Put grain and matched faces into the cutting brief.
Mark the face grain along the appropriate part dimension. State whether parts may rotate, which sides remain visible, and whether doors or adjacent panels must come from a matching sequence. Those requirements affect the layout even when the rectangular part dimensions stay the same.
For a cabinet run, identify paired doors and visible end panels. For a decorative wall, include the room elevation and veneer sequence. For a directional film texture, include the required surface orientation with the panel dimensions.
Send the finished part size, machining allowance and operations requested. If CUZI supplies cut parts, use the cut-to-size route with the material description, grain arrows, quantities and pack labels. Include any further machining or finishing your workshop will perform.
Keep visible groups with the numbered parts.
Identify left/right doors, adjoining end panels and spare pieces as a viewing group. Mark the selected face, grain arrow and permitted rotation on every part. For matched veneer, keep the retained sequence and intended final light/dark relationship with the layout.
If the cut schedule changes, review the group before accepting a new nesting plan. A layout with more rectangles can still require a different matched-face arrangement or additional reserve to complete the visible set.
KEEP EACH FORMAT AND THICKNESS ON ITS OWN LINE
Calculate net panel volume for a mixed buying schedule.
For dimensions in millimetres, net volume in m³ equals width × length × thickness × sheet count ÷ 1,000,000,000. Calculate every item separately, then add the net volumes. This preserves the sheet count and construction your purchasing and receiving teams need.
Illustrative item quantities and constructions for planning a quotation; packing and freight details are still required.
Scroll horizontally to compare all columns.
| Item and nominal dimensions | Sheet count / net volume per sheet | Total net volume |
|---|---|---|
| A · Commercial plywood 1220 × 2440 × 18 mm | 150 sheets / 0.0535824 m³ | 8.03736 m³ |
| B · Birch plywood 1525 × 3050 × 12 mm | 80 sheets / 0.0558150 m³ | 4.46520 m³ |
| Combined item list | 230 sheets, kept as two item lines | 12.50256 m³ net panels |
Add the selected face/back grade, inner veneers, bond, finish and document requirements to each line. For weight, use the density or measured mass of the proposed construction. The panel volume and loading guide separates these calculations from the packed shipment.
Keep volume, quantity and cost units separate.
The two lines total 230 sheets and 12.50256 m³ of nominal wood panels. They describe different formats and thicknesses, so keep the individual counts alongside the combined volume. A price per sheet, per m² or per m³ needs conversion against that exact item before comparing totals.
When several constructions share a load, retain a separate density or measured sheet mass for each. Add actual packing tare to net panels for gross cargo information. Do not derive container capacity by dividing a nominal container volume by net sheet volume alone.
Choose a format your workshop and receiving plan can handle.
Compare the sheet with your saw capacity, CNC working area, lifting equipment and storage. A longer or wider board may improve the part layout while changing unloading, movement and pack storage. Tell us about any size or bundle-weight limit that affects receiving.
Request the proposed sheets per bundle, external pack dimensions, protection, labels and gross weights. For a mixed load, keep the item codes visible on the packing schedule. Have the logistics provider check the actual bundles, permitted weights and arrangement for the selected equipment and route.
Net panel volume is useful for comparing item geometry. The loading plan also needs the real packing and weight information. Include both with the receiving requirements when you discuss packing and delivery.
Plan the bundle at its actual receiving stage.
Ask for external bundle dimensions, sheet count, protected-face arrangement, gross weight and item labels. Check access, unload equipment, supported storage and machine feed limits against the actual pack. Identify any split packs or workshop allocation required for a mixed shipment.
Keep visible or coated faces protected during the agreed handling sequence. Mark the receiving team’s size/weight constraints in the order so the chosen format and packing can be reviewed together.
MAKE THE QUOTATION MATCH YOUR DIMENSIONS
Start with a dimensioned item. Add the construction you need.
The two example requests below carry their nominal dimensions and sheet quantities into the form. Edit the values for your order and add the face, core, grade, bond and finish. The existing product selection remains available when you are building a mixed inquiry.
For a working trial, request a practical full-thickness cut sample and name the joint, finish or machining operation you want to assess. Keep the selected face/back and inner construction with the sample reference when discussing the production item.
CUZI's minimum order is one container, with mixed loads available. Regular production is 10–15 days; shipping time is additional. Request FOB or CIF with the named port. Samples are free, with freight paid by the buyer and a later-order freight credit available by agreement.
Retain the selected geometry for the repeat item.
Keep the actual cutting plan, face/back and core description, gauge/tolerance, trial result and pack labels beside the item code. If the format or construction changes later, review the cut layout, working fit and receiving arrangement before applying the earlier cost or output record.
Plywood sheet-size and thickness questions.
What are CUZI's regular plywood sheet sizes?
1220 × 2440 mm, 1250 × 2500 mm and 1525 × 3050 mm are the regular general plywood formats. Include the selected construction, thickness, quantity and tolerances in the inquiry.
Can I request a longer plywood sheet?
Yes. 1220 × 3050 mm and 1250 × 3660 mm are on-request formats. Send other required dimensions with the product construction, cut list and quantity to discuss the supply scope.
Is 1220 × 2440 mm plywood exactly 4×8 ft?
It is close to that reference. Exact conversion of 4×8 ft gives 1219.2 × 2438.4 mm. Use the stated 1220 × 2440 mm dimensions and the agreed tolerance when ordering and planning cuts.
Is 1525 × 3050 mm plywood exactly 5×10 ft?
It is close to that reference. Exact 5×10 ft converts to 1524 × 3048 mm. Retain 1525 × 3050 mm as the requested metric format on the item and drawing.
Can I use 18 mm plywood for a 3/4-inch requirement?
Reconcile the dimension and product requirement with the drawing before selecting the alternative. 3/4 in converts to 19.05 mm. Review the finished tolerance, joint and intended use with the proposed 18 mm construction.
Will a larger sheet always improve cutting yield?
Draw the layout using the actual part sizes, grain rules, kerf and trim. Compare accepted parts, usable offcuts, cutting and handling for each format. The worked grid in this guide is one defined example.
Can I mix plywood sizes and thicknesses in one order?
Yes. List each construction, size, thickness and quantity as a separate item. CUZI supplies mixed loads with a one-container minimum; agree the item packing and FOB/CIF quotation scope.
Does the net volume tell me the container sheet capacity?
A net volume calculation describes the boards in your list. Obtain actual bundle dimensions, packing and gross weights, then have the loading arrangement reviewed for the chosen container and route.