
On this page
IN BRIEF
Make the exposed edge part of the plywood specification
The edge your customer sees deserves the same attention as the face veneer. Select the core and lay-up, cut the real corner or routed profile, then review it through the intended filling, sanding and finish. Keep the accepted component and preparation record with the order so purchasing can compare appearance, usable parts and workshop cost together.
- Specify the visible edge and the core behind it.
- Compare raw, prepared and finished conditions on the same part.
- Order the selected construction with its appearance and processing reference.
UNDERSTAND THE DETAIL
Exposed plywood edge, painted edge or edge banding?
Start with the furniture detail. A clear-finished exposed edge shows the layered construction; paint gives a different appearance; edge banding or solid lipping adds a separate edge material. Compare the complete face-to-edge transition, corner and finished dimensions before choosing the route.
Scroll horizontally to compare all columns.
| Design route | Trial to prepare | What belongs on the order |
|---|---|---|
| Clear-finished layered edge | Cut the selected core with the visible long edge, corner and any routed profile; apply the intended finish. | Core and lay-up, visible layer pattern, permitted local repairs, profile and finished reference. |
| Painted edge | Prepare the edge and face using the selected filling, sanding and coating process. | Preparation steps, final appearance, face-edge transition and the accepted coating system. |
| Edge banding | Apply the chosen band and adhesive; finish the joint, ends and corner. | Band material, colour, thickness/build-up, adhesive process and finished component dimensions. |
| Solid lipping | Make the actual bonded joint and profile with the selected timber and panel. | Timber species and grain, joint geometry, preparation, finish and revised cutting dimensions. |
For an exposed edge, define the layered appearance and the amount and type of visible repair you can accept. For a covered edge, define the added material and joint appearance. Retain the finished reference that represents the selected route.
- Clear finished edge
- Review veneer lines, local gaps, machining marks and appearance after the intended coating.
- Painted edge
- Evaluate preparation and the final visual result alongside the painted face.
- Banded edge
- Assess the corner, joint line, colour and dimensions after applying the selected band.
Choose the core as deliberately as the face
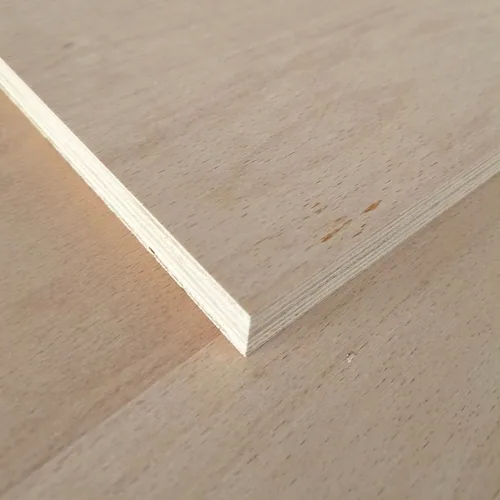
Birch-faced plywood can have poplar, birch or eucalyptus cores. Identify the actual construction being offered and request a cut edge from it. The face grade describes the selected face/back appearance; specify the exposed core, gaps, repairs and profile separately in the component acceptance record.
Continue with matching a panel face to its edge band.
Choose a reference with the difficult features
A short straight strip can help with colour, but your furniture may also include an outside corner, rounded profile, routed recess or exposed joint. Reproduce the feature that controls the customer’s acceptance. Mark the viewing face, exposed edges, grain direction and the position of any fixing near the profile.
Keep three stages of the same edge
Scroll horizontally to compare all columns.
| Stage | Record | Decision |
|---|---|---|
| Freshly machined edge | Actual cut direction, tool/setup, layer pattern, visible gaps, tears and corner condition. | Review the proposed construction and machining together before further processing. |
| Prepared edge | Local filling, sanding, permitted repairs, removed material and time spent. | Check the workload and geometry needed to reach the intended finish. |
| Finished component | Profile, sheen, colour, touch, face-edge transition and final dimensions. | Compare the whole part with the accepted appearance and processing reference. |
Photograph the same marked locations at each stage. Record which features were changed by filling, sanding or coating. Keep a physical component where the project depends on profile, sheen or touch; use photographs and notes to identify it.
Agree the repair criteria before finishing
Describe the visible edges, permitted repair method and appearance limits. Where a written size, count or location limit matters, put that project limit on the drawing or inspection sheet. Mark repairs allowed on concealed edges separately from those allowed on the finished front edge.
Keep appearance review and the selected material performance requirements as separate checks. If a feature raises a concern about the bond or core rather than only appearance, identify the location and refer it for the relevant material assessment before spending more on finishing.
Compare appearance, dimensions and workshop effort together
Trial candidate constructions with the same finished drawing and agreed appearance criteria. Record cutting, filling, sanding and finishing steps for each. Separate normal preparation from work correcting a rejected part, and identify any change in tools or coating process.
Keep exposed and banded dimensions clear
For an exposed edge, record the cut size and the material removed by the selected profile and sanding process. For a banded or lipped edge, record the final build-up on each edge, including the adhesive and final trimming where relevant. Identify whether the drawing dimensions are substrate sizes or finished sizes.
For a chosen 480 mm finished-width calculation, if the final build-up is 1.0 mm on each of two opposite edges, the starting substrate width is 480 − 1.0 − 1.0 = 478 mm. With a selected final build-up of 2.0 mm on each side it is 476 mm. Use the actual measured build-up of the selected process when setting the production cutting size.
A band or solid lipping changes the face-edge joint and may change the corner design. Retain it as a separately identified finished alternative, with its own dimensions and preparation record. Link the size decision to your cut list and grain-direction file.
Compare the selected process before carrying it into an order
Record the board model, construction, lot, tool/setup, filler and coating system with the component. If the core, profile, tool or finish changes, repeat the affected edge feature and update the acceptance and cost records together.
WORKED BUYING EXAMPLE
A visible shelf with two outside corners
Chosen budgeting inputs for comparing two edge-finishing routes.
The shelf has a long front edge and a visible return at each end. Its reference includes the actual outside corner, face-edge transition and intended coating. In a 20-blank planning exercise, route A allocates USD 240 to material and USD 60 to processing; route B allocates USD 270 to material and USD 40 to processing. The chosen forecast is 18 accepted shelves for A and 19 for B.
Scroll horizontally to compare all columns.
| Budget route | Chosen inputs | Cost per forecast accepted shelf |
|---|---|---|
| A: lower material budget | USD 240 material + USD 60 processing = USD 300; 18 of 20 forecast accepted. | 300 ÷ 18 = USD 16.67. |
| B: higher material budget, less processing | USD 270 material + USD 40 processing = USD 310; 19 of 20 forecast accepted. | 310 ÷ 19 = USD 16.32. |
| Common comparison | B’s allocated material is 12.5% higher and total budget is 3.33% higher. | With these chosen forecasts, B’s unrounded unit cost is about 2.11% lower. |
What this means for the order
The result depends on both processing cost and usable output. Replace the budgeting inputs with matched quotation scopes and recorded trial results, then compare each route per accepted shelf. Keep unfinished parts, rejected parts and recoverable offcuts separate from the accepted quantity.
Keep the original corner observations
Scroll horizontally to compare all columns.
| Item or observation | Record or compare | Next decision |
|---|---|---|
| Unfinished edge | Record the visible layer pattern, gaps and cutting marks. | Identify the observations affected by construction or preparation. |
| Finished corner | Compare rounding, coating and the face-edge transition. | Review the whole corner against the design reference. |
| Production estimate | Record accepted parts and preparation time on a common scope. | Compare the construction on cost per accepted shelf. |
Count each blank once in the material allocation. Include the chosen machining, finishing and rework costs once in the processing total; identify any agreed recovery credit separately. Keep development-trial costs and repeat-production estimates in separate columns.
Request the construction for your exposed-edge design
Birch Plywood is available in 3–30 mm with poplar, birch or eucalyptus cores. Request the actual constructions you want to compare, with the longest visible edge, an outside corner and any routed profile represented in the component. Keep the selected face and exposed-core appearance with the drawing.
Keep material and finishing cost on the same sheet
Record sheet cost and the cut plan used to allocate it to the components. Add filling, sanding, coating and other supplied operations on the same basis. Use the parts completing the agreed acceptance process as the denominator, with repair time and recovery adjustments identified.
Send the complete edge brief
Include the finished-edge photograph or design reference, profile drawing, viewing conditions, coating system, panel gauge and selected core alternatives. Mark permitted filling and the edges visible in the assembled furniture. Ask for the proposed construction information with the component sample.
After selection, carry the board, drawing, preparation and finish revisions into the order line. Keep repeat orders linked to the finished reference and review changes through the component change-control record.
Keep these details with your inquiry
- Visible face, edge, corner and profile locations on the drawing.
- Proposed face veneer, core, lay-up, gauge and board model.
- Raw, prepared and finished component references at the same marked locations.
- Permitted repair method and project appearance limits.
- Cut and finished dimensions, removed material or final edge build-up.
- Preparation steps and time, quotation scope, accepted quantity and recovery adjustments.
- Selected board, machining and finish revisions for repeat orders.
Review the relevant product guide and prepare your inquiry files.
Questions buyers ask
Is a photograph enough to approve the edge?
A photograph records appearance, but cannot confirm touch, exact colour or the profile of a finished edge. Use photographs to document the marked locations and decision. Inspect a representative finished component where profile, sheen, colour or touch matters, and keep the physical reference identified for the project.
Can a lower face grade work for this part?
Yes, when the finished part meets the agreed appearance and construction requirements. Select the visible face and exposed core separately, then evaluate the actual finished part. Put the accepted face, core, repairs and profile on the component record.
Does a birch face mean the edge is all birch?
No. Birch on the face does not establish birch throughout the edge. Birch-faced panels may use poplar, birch or eucalyptus cores. Specify the actual core and lay-up, request a cut edge and retain the selected construction with the finish reference.
Should the edge be reviewed before or after filling?
Keep observations from both stages and from the final finish. Record the permitted repairs and time required so appearance and preparation workload stay linked.
How should I compare a banded alternative?
Identify the band, adhesive process, joint, corner and final build-up. Review it as a separately named finished route and calculate the cutting size from the selected finished drawing.
What makes an edge sample useful for repeat orders?
Link the physical component to the board model, core, gauge, drawing, tool/setup, preparation and finish revisions. When one changes, repeat the edge feature affected by that change and update the reference.