On this page
THE FACE YOUR CUSTOMER SEES. THE CORE YOUR WORKSHOP USES.
Choose the birch surface and the construction together.
Birch faced plywood describes the outer veneer. All-birch plywood specifies birch through the panel, including its inner veneers. A birch face can sit over poplar, eucalyptus or birch. Put the complete construction beside the grade, thickness and component drawing when comparing quotations.
For a cabinet with covered edges, you may want to compare different cores behind the same birch face. For a furniture piece with a visible ply edge, bring that edge into the selection from the start. CUZI supplies birch plywood in 3–30 mm with poplar, birch and eucalyptus core options. Request two constructions and try the detail that decides your order.
The choice becomes more useful when it follows a part through cutting, machining, fitting and finishing. Identify the visible edge, the connector location and the required weight before comparing cores. Ask for the same drawing and finish in two constructions so your workshop can measure what changes and purchasing can cost the accepted result.
A similar face can cover a different layer schedule.
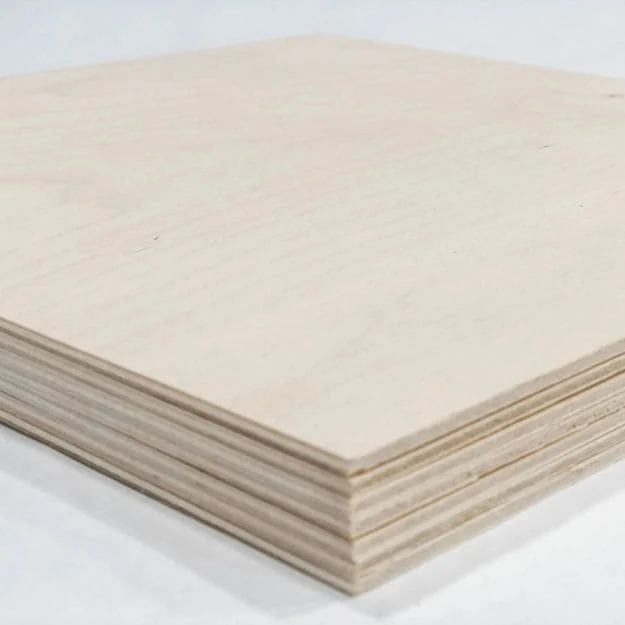
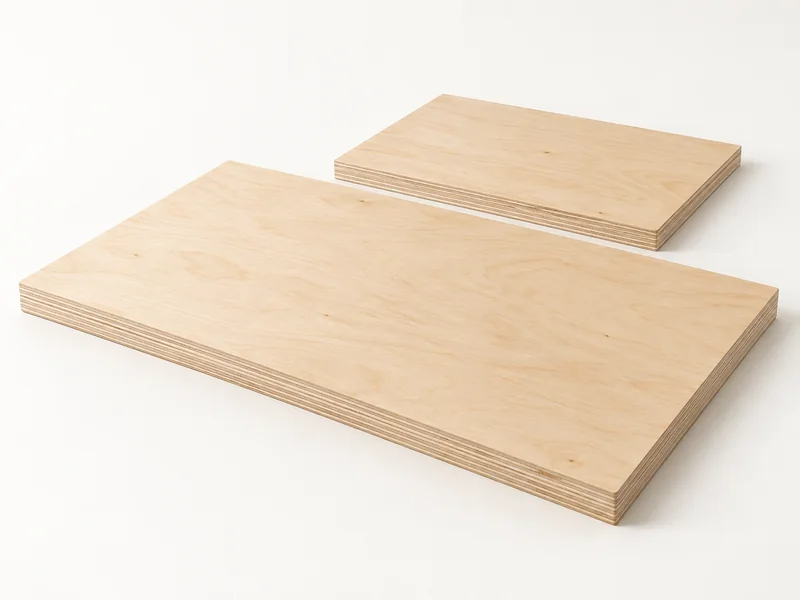
Read the face, back and inner veneers as separate parts of the offer. “Birch core” should be connected to a full layer schedule: identify the crossbands and any other internal species as well as the central layers. For an all-birch requirement, write birch face, birch back and birch throughout all inner veneer layers.
These layer schematics show species arrangements. Obtain the actual ply count, veneer gauges and sequence for the thickness being quoted. The APA plywood overview explains cross-laminated veneer construction; the layer arrangement belongs in the material specification.
As a manufacturer example, WISA's birch construction guidance identifies birch through its own birch panels. Use the proposed supplier's schedule and product data to identify the construction you are buying.
Scroll horizontally to compare all columns.
| Offer wording | What it identifies | What to put on the item |
|---|---|---|
| Birch faced plywood | The birch surface veneer. | Back species, inner species, layer sequence, veneer thicknesses and face/back grades. |
| Birch face with poplar or eucalyptus core | A named surface and core selection. | Complete inner construction, including crossbands and any mixed species. |
| All-birch / birch throughout | Birch specified in every veneer layer. | Actual ply count, gauges, grain sequence, permitted repairs and relevant product data. |
Start with Birch Plywood for the birch surface and core choices. Review Poplar Core Plywood when developing a poplar construction or Commercial Plywood for other face/core combinations.
Keep the outer appearance and inner identity readable.
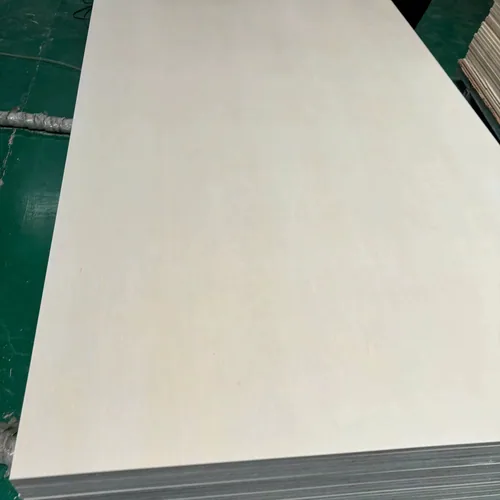
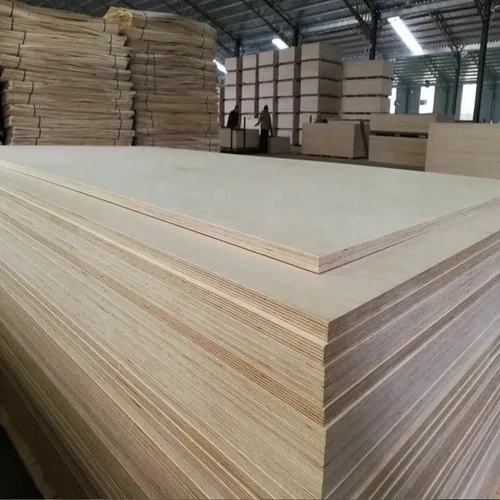
The photographs show birch-faced and all-birch panels with pale faces and exposed veneer layers. Use the full veneer schedule to identify the inner species and their arrangement. Give the face and back their own grades, veneer gauges and sanding condition when selecting the appearance your customer will see.
For a proposed birch/poplar or birch/eucalyptus alternative, ask how every inner layer is identified, including crossbands. For birch throughout, retain that species requirement across both outer veneers and all inner layers. The complete item description is the useful reference when sampling, receiving and reordering the panel.
Spend on the construction your component needs.
A clear-finished chair, a cabinet carcass and a routed connector can make different core requirements worthwhile. Show where the material stays visible and where the hardware transfers load. Compare the complete finished part, including the operations your workshop will perform.
Scroll horizontally to compare all columns.
| Your component | Construction comparison | Deciding trial |
|---|---|---|
| Cabinet parts with covered edges | Birch face over poplar, birch or eucalyptus at the same requested grade and thickness. | Face under the finish, fitted joints, hinge/connector detail and completed-unit weight. |
| Furniture with an exposed ply edge | All-birch alongside the proposed birch-faced alternative, with its full lay-up shown. | Routed profile, visible gaps/repairs, sanding work and finished edge appearance. |
| CNC pockets, slots and inserts | Constructions identified layer by layer at the machining depth. | Smallest feature, mating part, thickness variation and actual fitting preparation. |
| Panels with a specified load or span | Product-specific properties and the design's required panel designation. | Relevant data, loading/support arrangement and the designer's acceptance criteria. |
For an exposed edge, make appearance a written requirement with a finished reference. For a concealed core, focus the comparison on fit, function and the work needed to produce an accepted component. Identify any structural or safety requirement with the drawing and relevant product documentation.
Mark the areas where changing the core changes the trial.
Show a concealed edge, an exposed routed edge and a hardware recess separately on the drawing. Select the actual screw, insert or hinge preparation your team will use. Record the completed fit and any specified component test alongside the machining and finishing observations.
When the alternative uses a different thickness, layer sequence or face gauge, identify it on a revised comparison line. The same face species can remain visually relevant while the material at a pocket or connector changes. Keep the chosen construction with those critical drawing details.
CUZI birch plywood: build your buying schedule.
Scroll horizontally to compare all columns.
| Item detail | Available options | Select for the quotation |
|---|---|---|
| Nominal thickness | 3–30 mm. | Each required thickness, finished tolerance and machining/fit requirement. |
| Construction | Birch face with poplar, birch or eucalyptus core; all-birch construction. | Face/back species and full inner veneer schedule, including throughout-birch scope where required. |
| Face/back grades | BB/CC or C/D. | Grading basis, visible sides, permitted patches/repairs and finish reference. |
| Emission options | E0 or E1. | Required method, destination and documents for the proposed panel. |
| Regular formats | 1220 × 2440 mm; 1250 × 2500 mm; 1525 × 3050 mm. | Width/length, grain direction, cut layout and quantity per item. |
| Formats on request | 1220 × 3050 mm; 1250 × 3660 mm and other requested sizes. | Requested format alongside the selected thickness and construction. |
Use the sheet-size and thickness guide to connect the format with the cut list. Keep finished-thickness tolerance separate from nominal thickness, especially for fitted CNC joints. Ask for face veneer thickness after sanding when your finish or profile depends on the remaining surface layer.
BB/CC and C/D belong with an agreed appearance basis and sample. The face/back grade guide helps describe repairs and viewing surfaces. The bond-class guide and destination document guide help complete the service and market requirements.
Order each combination as a distinct item.
Give thickness, format, face/back grade, complete core schedule and document requirement their own fields for each quantity. Show the face-grain direction on the cutting list and state whether dimensions describe delivered sheets or finished parts. This helps a mixed container keep similar-looking panels identifiable.
Include the selected bond designation and any customer-specific inspection or testing with the item. For a clear finish, send the physical face and exposed-edge reference. The quotation can then connect the available commercial options to the exact appearance and production requirement.
Ask for the layers that the product name leaves open.
Request the veneer schedule for your selected thickness: species, sequence, grain direction and nominal veneer gauges. Include face/back gauges and the surface sanding condition. A fixed number of plies alone leaves the species and individual layer thicknesses open.
For an all-birch order, keep every inner layer in the birch requirement. For a mixed construction, list the species by layer or identify the agreed repeated sequence. If your design requires a particular balanced arrangement, put that arrangement on the item and review it with the finished panel.
Review internal quality where the drawing exposes or relies on it. Define permitted gaps, overlaps and repairs with locations, measurement and inspection scope. Compare a full-thickness cut edge and a routed pocket; use the core-void and ply-count inspection guide to plan broader sheet checks when needed.
Request measured panel density or sheet mass for the actual construction when weight affects handling or packing. Keep dimensions, moisture/conditioning and the measurement method with the value. Add hardware, finish and edging when checking the weight of a completed furniture unit.
Check the layer arithmetic as well as the ply count.
Layer calculation assumptions: two chosen schedules with a nominal veneer sum of 18 mm. These sums illustrate different layer gauges; actual offered schedules need the species, pressing/sanding condition and finished dimension identified with the quotation.
Scroll horizontally to compare all columns.
| Arithmetic schedule | Face + back | Inner veneers | Nominal sum |
|---|---|---|---|
| 9 layers | 2 × 0.60 = 1.20 mm | 7 × 2.40 = 16.80 mm | 18.00 mm |
| 13 layers | 2 × 0.75 = 1.50 mm | 11 × 1.50 = 16.50 mm | 18.00 mm |
The arithmetic leaves adhesive contribution, pressing and sanding outside the stated sums. Request the delivered dimension and remaining face veneer thickness under their own measurement conditions. A larger layer count still needs species, gauges, sequence, internal quality and relevant properties to describe the material your part uses.
Compare mass from the offered construction data.
Weight calculation assumptions: 180 rectangular shelves, each 800 × 300 × 18 mm, compared at chosen densities of 550 and 700 kg/m³. These inputs demonstrate the calculation and are not assigned species-density values.
Scroll horizontally to compare all columns.
| Density input | Volume per shelf | Mass per shelf | 180-shelf mass |
|---|---|---|---|
| 550 kg/m³ | 0.00432 m³ | 2.38 kg | 427.68 kg |
| 700 kg/m³ | 0.00432 m³ | 3.02 kg | 544.32 kg |
The net shelf area is 43.20 m² and bare volume is 0.77760 m³. Multiply the unrounded volume by the actual quoted density and quantity; the chosen inputs differ by 116.64 kg across the batch. Add hardware, edging and finish for completed parts, then packing for the shipping total.
Let the cut edge and the real fitting answer the question.
Send one drawing that both samples can follow. Choose a detail with the tightest joint, smallest routed feature or most visible edge in the design. Keep cutting direction, tools, feed settings and finish consistent while recording what changes with the construction.
- Look through the panel. Label the sample and photograph the full-thickness edge with a scale. Record visible layers, gaps and repairs at the cut location.
- Machine the working detail. Route the actual slot, pocket or profile. Record measured thickness and how the mating part fits.
- Fit the hardware. Use the specified screw, insert or hinge, with the intended hole preparation and location. Record the method and any required test result.
- Finish the viewing surfaces. Apply the planned coating to the face and exposed edge. Review repair colour, grain, sanding work and appearance together.
- Keep the decision. Save the selected sample, drawing revision, construction and observations for the order.
For production comparison, record accepted parts, repair work and rejects against each construction. Compare the landed material and processing cost per accepted component. A useful trial shows both the finished result and the effort needed to achieve it.
The cabinet hardware trial and exposed-edge finishing guide give you worksheets for the two details. Include any laboratory test required by your specification alongside the workshop observations.
Record the finished edge with the work needed to produce it.
Retain the cut location and viewing orientation with each edge photograph. Route the intended profile and apply the planned finish to the face and edge. Record visible gaps or repairs at that location, sanding effort and the finished appearance under the chosen viewing conditions.
Keep a cosmetic repair decision separate from any required mechanical test. A local cut-edge view helps compare the working detail; a broader inspection plan needs its own locations and scope across the offered sheets. Put the agreed internal-quality criteria beside the selected construction before production.
Looking for a Baltic birch plywood alternative?
Send the current panel reference and tell us what you need to reproduce: veneer species, ply arrangement, face/back appearance, finished thickness, bond, machining result and destination documents. If country of manufacture is part of your purchasing specification, include it as its own field.
CUZI is based in Xuzhou, China. Our Chinese supply can be compared as a proposed alternative against your drawing and reference. An all-birch construction identifies the veneer species; the quotation and shipment documents identify the manufacturing origin.
For a replacement part, measure the actual thickness and fitting dimensions of the existing material. Review its finished edge and appearance beside the proposed sample. Keep the approved construction and origin description on the purchase line so your workshop and sales team use the same material identity.
Compare the reference without losing its identity.
If your current purchase specifies a brand, origin, grade or product standard, keep those fields on the reference line. List which features your customer requires from a proposed alternative and which changes can be considered. Review the supplied data with the component trial and the destination requirements.
When purchasing selects a different origin or construction, update the quotation, order description and receiving reference consistently. Give your workshop the new schedule and finished reference so it can reproduce the accepted detail under the material actually ordered.
Turn “18 mm birch” into six useful order fields.
Send what you know now. A drawing, a current panel reference or a photograph of the finished piece can help explain the missing details. Keep the same six fields on each alternative so the offers remain easy to compare.
| Field | Include with the item |
|---|---|
| 1. Component and reference | Furniture part/drawing revision, viewing surfaces, service conditions and any required origin or current panel reference. |
| 2. Veneer construction | Birch face/back, selected poplar/birch/eucalyptus inner construction or birch throughout; layer schedule and veneer gauges. |
| 3. Grade and finish | BB/CC or C/D, grading basis, repair/colour range, surface condition and intended coating/edge reference. |
| 4. Dimensions and fit | Nominal/finished thickness, tolerance, sheet width/length, grain direction and sample/component dimensions. |
| 5. Performance and documents | Bond designation/method, emission requirement/method, destination, relevant component data and inspection scope. |
| 6. Order and trial | Sheet quantities by item, FOB/CIF port, target receiving date and the two constructions/detail to sample. |
Discuss my birch plywood order
Cost the same accepted component in each offer.
Include landed sheets or delivered blanks, cutting losses, machining, repairs, sanding and coating within a defined comparison scope. Record accepted output after the operations that decide your order. Compare cost per accepted part, and retain any additional work caused by an alternative construction on its line.
Give the two options a shared part code and drawing revision, with separate material identities. Add the same quantity, port and requested document list. This lets the quotation answer the buyer's actual choice while keeping changes visible to production and receiving.
Same part. Two constructions. A clearer buying decision.
Request birch-faced poplar-core and all-birch samples for the same drawing, grade, thickness and finish. If eucalyptus is your preferred alternative, choose that route and describe the second construction in the request. Include a full-thickness cut edge and the machining/fitting detail you want to try.
Samples are free. Buyer pays courier freight; a freight credit toward a later order can be agreed for that order. Keep the selected sample and complete construction with the purchase specification.
Need the veneer schedule before selecting a sample? Choose the construction data to discuss with your inquiry.
Download the birch plywood sample worksheet (.csv) to record thickness, appearance, cut edge, machining and your selection.
Carry the chosen construction into your next container.
CUZI orders start at one container, with mixed loads available. Keep each thickness, core, grade and format on a separate item line, then combine birch plywood with the other panels your business needs. The mixed-order schedule connects item quantities with the packing list.
Regular production takes 10–15 days; shipping time is additional. FOB and CIF quotations are available. Share your destination port and target receiving date to plan the order around the selected construction, sample decision and requested documents.
Retain the agreed veneer schedule, finished reference and inspection details with the order. At receiving, match bundle/item references and documents to that selection before the material enters production.
Keep the next batch linked to the chosen layers.
Use the order reference to connect the veneer schedule, finished face/edge reference, bundle identification and supplied documents. Match received thickness, labels and the agreed inspection observations with that record. If an alternative lay-up or face gauge is proposed for a repeat order, keep the change with the affected item and trial detail.
Questions buyers ask about birch construction
Is birch faced plywood the same as all-birch plywood?
Birch faced describes the outer veneer. All-birch specifies birch face, back and every inner veneer layer. Put the complete species and layer schedule on the inquiry to identify the proposed panel.
Can birch plywood have a poplar or eucalyptus core?
Yes. CUZI offers birch-faced constructions with poplar, birch or eucalyptus cores in 3–30 mm. Specify the back and complete inner construction with the selected grade, dimensions and use.
Does a birch core description confirm birch throughout?
Ask for the full veneer schedule, including crossbands and both outer veneers. For a throughout requirement, write birch in every veneer layer and retain that description on the quotation and order.
Which construction should I choose for an exposed plywood edge?
Compare the actual routed, sanded and coated edge of the proposed constructions. Include permitted gaps, repairs and layer appearance with the finish reference, then select the sample that meets your design.
Does all-birch mean a fixed ply count or a gap-free core?
The species description leaves ply count, veneer gauges and internal quality to be specified. Request the schedule for your thickness and agree permitted gaps/repairs and inspection scope around the component.
Can I compare a CUZI panel with my Baltic birch reference?
Yes. Send the current material identity, drawing and performance/appearance requirements. Compare the proposed Chinese supply with that reference and state any required manufacturing origin separately.
Does all-birch establish the bond or emission standard?
List the bond designation and emission requirement separately, with methods and destination documents. Request data for the proposed construction and retain those requirements with the purchase specification.
Can I request two samples before ordering a container?
Yes. Request two constructions against the same drawing, thickness, grade and finish. Samples are free; buyer pays freight, with a later-order freight credit by agreement. Keep the selected sample reference and veneer schedule for the order.