On this page
CHOOSE FOR THE COMPONENT YOU SELL
MDF or particleboard? Start with the finished furniture part.
For a routed, painted front, begin your comparison with MDF and its complete coating process. For a flat decorative cabinet part, compare the offered MDF and particleboard constructions with the same face, edge band and fittings. Bring plywood into the shortlist when a veneer face or layered edge is part of the design.
The most useful choice connects the board to your production line: how it cuts, finishes, assembles and reaches an accepted part. Specify the grade and construction of each candidate before comparing its price.
A faster way to narrow the order is to separate the furniture into three jobs: shaped or painted fronts, flat decorated carcass parts, and visible veneer details. Compare one demanding detail from each job, then combine the selected materials under clear item codes. This gives you a useful mixed order without forcing one board to do every operation.
Fibres, particles or veneer layers: what is inside the board?
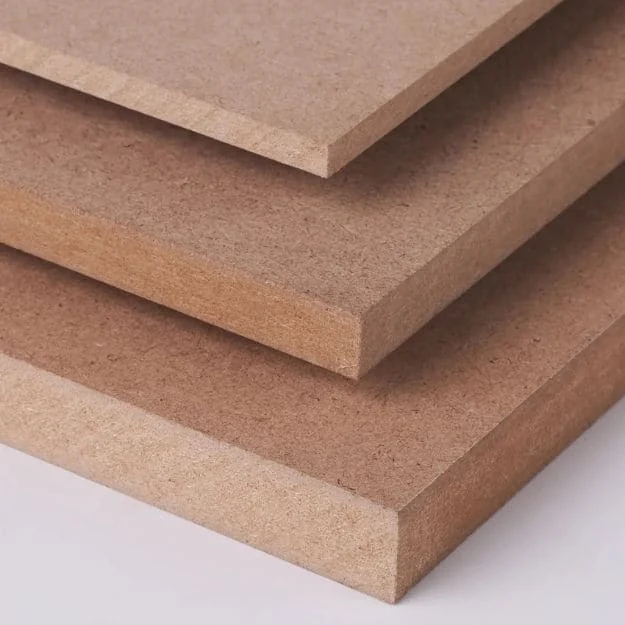
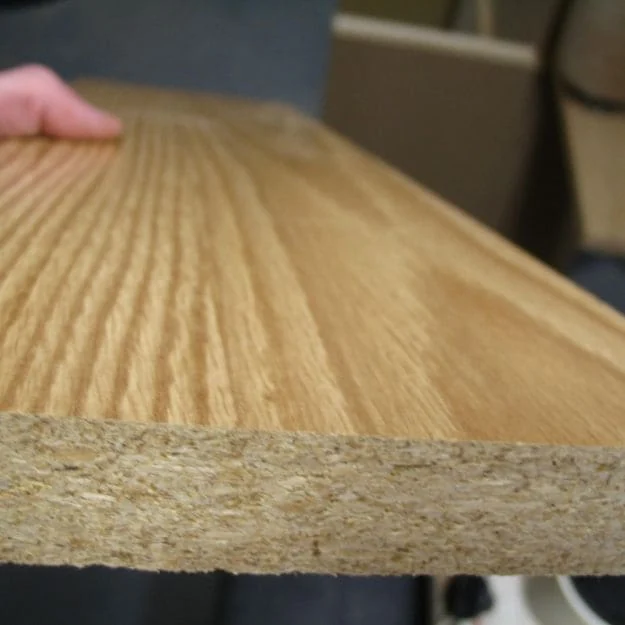
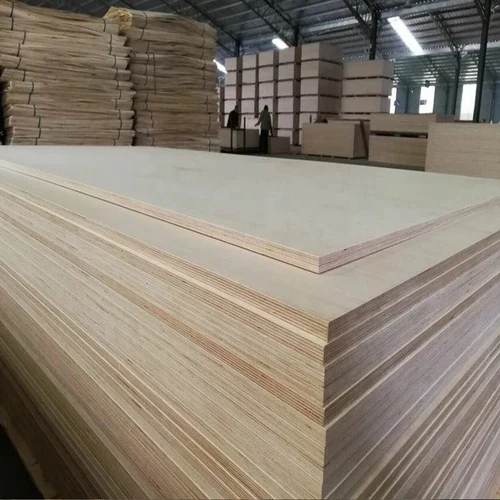
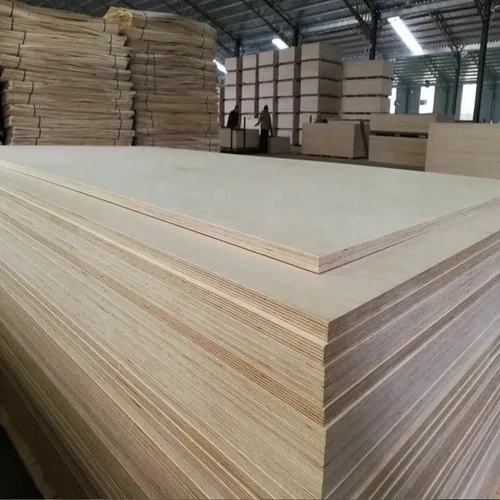
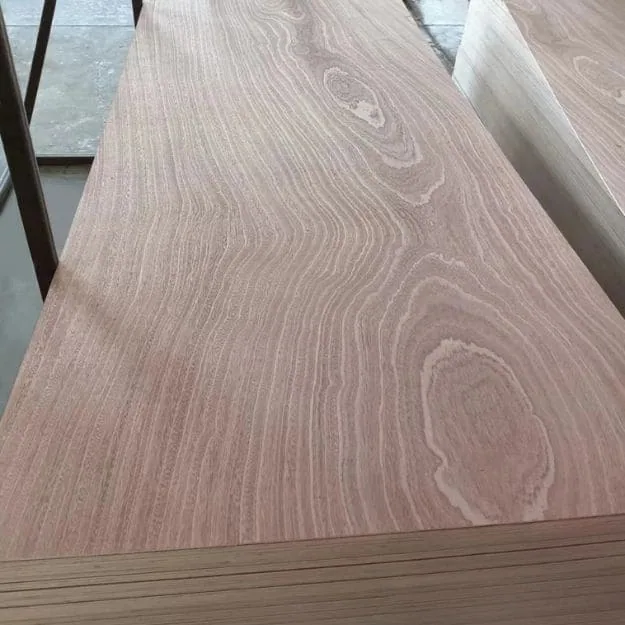
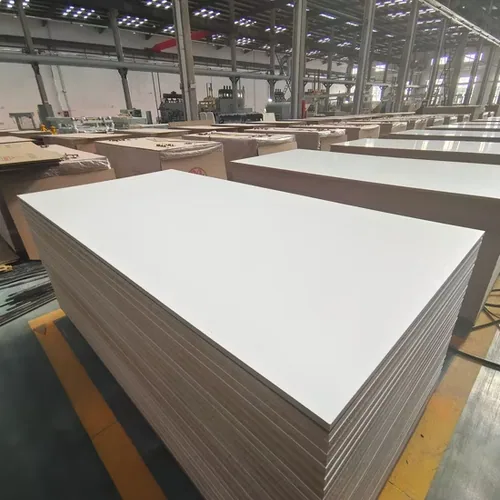
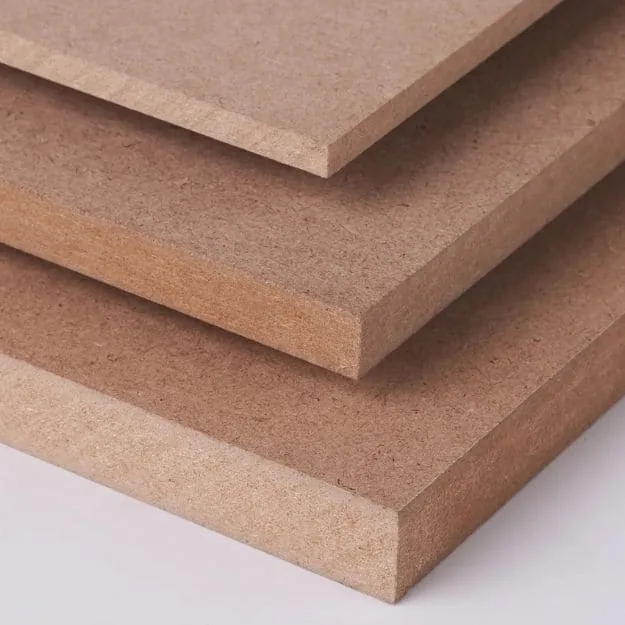
Schematic substrate sections, with illustrative colours and layers. Inspect the offered board’s cut edge and material designation for your purchase.
The Composite Panel Association describes MDF as a fibre-based composite and particleboard as a particle-based composite. APA’s plywood overview explains the veneer-layer construction. Product properties and grades belong to the particular panel being offered.
“Chipboard vs MDF” is usually another way of asking about particleboard versus MDF in a furniture brief. Keep the supplier’s exact board designation in the item description. If the offer is decorative, also name the facing: our MDF versus melamine board guide separates substrate and surface choices.
Read the cut edge before comparing the finish.
In the photographs, MDF has a fine fibrous section, the faced particleboard shows individual bonded particles, and plywood shows veneer layers. These visible constructions help identify the material family. The photographs do not establish a density, emission class, bond class or load capacity.
The particleboard photograph has a woodgrain facing. It is useful for seeing the core, while the offered facing system still needs its own description. Avoid treating a woodgrain surface as proof of melamine, natural veneer or a particular substrate. Keep the core designation and face/reverse system on the quotation.
COMPARE THE WORK YOUR FACTORY WILL DO
Match the substrate to the demanding detail.
Scroll horizontally to compare all columns.
| Your component | Useful shortlist | Trial before selecting |
|---|---|---|
| Routed painted front | Plain MDF, with the selected grade and finished thickness. | Deepest profile, exposed edge, face/reverse preparation, cured finish and hinge fitting. |
| Flat decorative cabinet interior | Faced MDF or particleboard with the required decor and reverse. | Cut quality, matching edge band, connector holes, corner joint and assembled appearance. |
| Visible veneer or layered edge | Plywood with the face species, inner veneers and appearance range specified. | Cut core, sanding/coating, viewing face, repaired areas and an assembled corner. |
| Shelf or loaded assembly | Offered grades assessed against the actual span, load, supports and fittings. | Relevant material data and the agreed assembly assessment, including orientation where applicable. |
A furniture range can combine these routes. A routed front may need a different panel from a concealed interior or an exposed-edge side. Keep each component’s construction and finished dimensions identifiable when combining the order.
For a detailed two-material comparison, continue with plywood versus MDF for furniture. Use Plain MDF, Commercial Plywood and the particleboard project route to discuss the constructions on your shortlist.
Compare like-for-like delivered stages.
| Field | What to align across the shortlist |
|---|---|
| Finished component | Same drawing issue, dimensions, viewing sides and acceptance detail. |
| Panel identity | Exact MDF/particleboard grade or plywood veneer construction, gauge and required data. |
| Surface and reverse | Raw/coated/faced stage, selected decor or veneer, reverse and complete gauge. |
| Fabrication | Included cutting, holes, edge work and finish; remaining workshop operations. |
| Delivered quantity | Sheets versus cut parts, usable quantity, reserve, packing and named port. |
If one supplier prices an unfinished board and another prices a cut, edged part, separate those stages before deciding which is better value. Your processing route and accepted output complete the comparison.
Judge the cut and finish on a representative part.
For MDF, make the actual routed feature and follow it through preparation and coating. Include the narrow section, recess or exposed edge that demands the most from your workshop process.
For a faced MDF or particleboard component, inspect the saw cut, applied edge band and drilled feature. Compare the edge joint, decor match and finished corner together. Specify the delivered edging or fabrication scope if you want those operations included in the quotation.
For plywood, assess the proposed veneer lay-up at the cut edge. Show whether that edge will remain visible, be banded or be painted. Identify the appearance you accept at the face, repairs and finished core before pricing the preparation.
Put the same drawing and finish reference beside each alternative. Record the useful cutting yield and any extra operation needed to obtain the finished detail. Our decor and edge guide and exposed plywood edge guide help define those two routes.
Choose the most revealing operation.
For the painted front, include the deepest recess and the narrowest remaining section. Run the intended preparation and cured coating, then view the face-to-edge transition under the project lighting. Price the work needed to reach that finish, including any second preparation pass.
For a flat faced part, make an outside corner with the actual edge band and decor direction. Inspect the cut line, band joint, trimming and drilled hole together. A broad colour chip helps with appearance, while the completed corner answers the manufacturing question.
For the exposed plywood detail, compare the finished cut edge alongside the selected face. Record whether core gaps, repaired areas or changes in veneer tone affect that design, and price any filling or lipping included in the supplied work.
Evaluate the real fitting, support and finished weight.
Compare your chosen hinge, connector, screw or support in the proposed panel. Include hole positions, pilot preparation, edge distances and the remaining material around a pocket or groove in the drawing. Follow the fitting supplier’s requirements when preparing the assembly.
For a shelf, provide its dimensions, span, load and support arrangement. Ask for the data relevant to the offered grade and orientation, then assess the assembled detail against the requirement agreed for that furniture part.
For handling weight, use the offered panel’s density or a measured sample weight with the actual dimensions. Include facing, edge band and fittings when comparing completed components. The same nominal thickness can describe different constructions and weights.
Use the panel and hardware trial for connectors and hinges, or the shelf design brief to organise the load and support information.
Separate face fixing, edge fixing and repeated assembly.
Scroll horizontally to compare all columns.
| Connection | Drawing and trial detail | Record |
|---|---|---|
| Hinge pocket | Chosen fitting, bore position/depth, remaining back material and fastener preparation. | Completed door fit, movement and required fitting assessment. |
| Edge connector | Actual edge entry, hole size/depth, edge distance and assembly sequence. | Joint seating and the specified connection test with its method. |
| Knock-down joint | Connector system and planned assembly/disassembly sequence on the finished parts. | Fit and condition after the agreed sequence. |
| Shelf support | Span, support positions, hole geometry, intended loading and permitted movement. | Offered directional properties and the agreed assembly result. |
Do not transfer a fastener or pilot-hole setting from the previous board without reviewing the new construction. Match the fitting maker’s instructions to the offered panel, and retain the selected process with the repeat item.
A panel-density figure alone does not rank the completed joint or shelf. Compare the relevant board data and connection design together. For a handling limit, weigh or calculate the entire finished part, including facing, band, coating and hardware.
SELECT THE GRADE FOR THE ROOM AND DESTINATION
Include exposure and product documents in the same brief.
Describe where the furniture will sit, including humid air, cleaning, splashes or contact that affect it. Select the substrate or plywood bond for those conditions, and define the reverse, cut edges, openings and joints in the complete component.
For MDF, the MR versus standard MDF comparison explains the interior moisture-related choice. For a particleboard alternative, request the proposed type’s relevant moisture information. For plywood, include the selected bond and product designation with the exposure requirement.
Name the destination and emission requirement with the test method and supporting product documents you need. A useful document request identifies the offered construction, board grade, dimensions and facing rather than a broad material name.
You can read the RAW MDF report and request data corresponding to your selected board. Company certificates and product test records serve different purposes; review the relevant information for the panel you plan to order.
Keep the core requirement distinct from the decorative face.
For a humid interior, describe the actual cleaning, splash points and exposed cuts before requesting the board grade. The selected facing, cut-edge treatment, openings and installation remain part of the complete furniture detail. A decorative surface name does not identify the core’s moisture grade.
Keep density, mechanical results, moisture-related results and emission documents tied to the offered product designation. For a replacement material, check the covered construction and required method instead of carrying a result from a different substrate into the new item. Our US/EU document guide helps prepare the destination file.
Which route gives you the better accepted-part cost?
Ask each supplier to quote the same panel or component schedule, facing scope and delivery terms. Add the workshop work your business will perform, including preparation, edging, fitting and handling.
Use accepted output as the denominator. A panel offer with a lower sheet cost can require more processing or leave fewer usable parts. A decorative faced offer may include operations your factory would otherwise add. Price those differences against the same finished result.
Open a hypothetical costing calculation
This is a hypothetical comparison for a planned batch of 100 cabinet parts, using the budgets and accepted outputs below.
Scroll horizontally to compare all columns.
| Trial route | Assumed panel and workshop cost | Accepted-part cost |
|---|---|---|
| A | $1,000 panels + $500 workshop = $1,500; 95 accepted parts. | $1,500 ÷ 95 = $15.79 per accepted part. |
| B | $1,200 panels + $250 workshop = $1,450; 98 accepted parts. | $1,450 ÷ 98 = $14.80 per accepted part. |
Both routes would also need the same treatment of freight, hardware, packing and other excluded costs. Substitute your actual quotations, processing budgets and trial output before choosing.
CUZI uses FOB or CIF quotations. State the shipment or destination port, item quantities and packing scope, then compare the transport and local costs your purchase includes. The panel quote and processing-cost guide helps structure that comparison.
Price enough accepted output to finish the order.
In the calculation above, route A’s initial batch leaves five parts to replace and route B leaves two. Before ordering a finished quantity of 100, include the replacement route, extra handling and any additional delivery. The initial accepted-part ratio is useful for comparing the trial, but it does not by itself complete that order.
Keep the same cost currency, price unit and output stage. Show raw sheets, facing, cutting, banding, coating, hardware, rework and packing on separate lines where those costs change between alternatives. Retain the process and construction that produced the chosen result for the repeat quotation.
BUILD A PRACTICAL MATERIAL SHORTLIST
Actual supply routes for your next furniture order.
Scroll horizontally to compare all columns.
| Material route | Supply starting point | Choose with the component |
|---|---|---|
| Standard Plain MDF | 2.5–35 mm; E0/E1/E2 options. Regular 1220 × 2440 and 2100 × 2800 mm sheets. | Grade, thickness/tolerance, machining, finish, fitting and destination. |
| Commercial Plywood | 3–30 mm; poplar, birch or eucalyptus cores; BB/CC or C/D; E0/E1 options. | Face species, inner construction, appearance range, bond and finished edge. |
| Particleboard | Project supply with the board designation, dimensions, facing and required data in the quotation. | Type, finished size, decor/reverse, edge band, connectors and trial requirement. |
| Decorative MDF | Black, white or woodgrain melamine faced MDF, with finished thickness and front/reverse quoted by construction. | Physical decor master, texture, sheen, visible-edge layout and matching band. |
Regular plywood sizes are 1220 × 2440, 1250 × 2500 and 1525 × 3050 mm. Plywood 1220 × 3050 and 1250 × 3660 mm, and other formats, are on request. MDF formats 1220 × 3050, 1830 × 3660 and 1220 × 3660 mm are on request. Confirm a decorative facing’s format against the selected construction.
MR and fire-retardant MDF are available in 9–25 mm with E0/E1 options. Identify the special board requirement when discussing an alternative; a decorative surface and substrate grade remain separate parts of the item.
One furniture range can use a clear material mix.
Consider a cabinet range with painted profiled doors, woodgrain interiors and a visible plywood-edge side. Give each part its own material line and sample reference, while keeping the assembly dimensions and fittings coordinated.
- Door: compare the raw MDF grade through routing, preparation and coating.
- Interior: compare the proposed faced MDF and particleboard on the same decor, cut edge and connector detail.
- Visible side: select the plywood face, lay-up and finished-edge appearance.
The order minimum is one container, and mixed loads are available. Regular board production guidance is 10–15 days; shipping time is additional. Separate your quantities by construction, thickness, format and decor so the quotation and packing follow the furniture range.
Use the mixed-panel order schedule for the item list. Discuss prepared parts through cut-to-size panels or MDF machining when you want drawing-based operations included.
Turn the furniture range into counted component lines.
For a quantity-planning calculation, take 60 cabinet units with two painted fronts, two decorative sides and three decorative shelves per unit. The rectangles below are drawing inputs, not a ready-to-build cabinet design or stock-size promise.
Scroll horizontally to compare all columns.
| Component and dimensions | Count | Net board area | Both broad faces |
|---|---|---|---|
| Painted front, 600 × 350 mm | 120 | 25.20 m² | 50.40 m² |
| Decorative side, 700 × 500 mm | 120 | 42.00 m² | 84.00 m² |
| Decorative shelf, 600 × 450 mm | 180 | 48.60 m² | 97.20 m² |
The list contains 420 parts and 115.80 m² of net board area. If only each side’s 700 mm front edge and each shelf’s 600 mm front edge are banded, their banded length totals 84 + 108 = 192 m. The painted fronts use their specified edge preparation and coating rather than that banding allowance.
These quantities exclude kerf, profiles, holes, waste and reserve. Choose the actual thicknesses, raw/faced constructions and grain directions, then prepare a cut layout for purchased sheets. Keep the front’s finish route separate from the two decorative routes so a mixed container can follow the production sequence.
COMPARE TWO OFFERED CONSTRUCTIONS IN YOUR WORKSHOP
Make the sample answer the material decision.
Send the same part drawing, finish reference, fitting and acceptance requirement for the alternatives you want to compare. Name both constructions in your message when requesting a paired sample set, with each thickness, dimensions and working detail.
Request the two constructions around one finished task.
Scroll horizontally to compare all columns.
| Production task | Keep identical across the alternatives | Begin the paired comparison |
|---|---|---|
| Routed and painted front | Drawing, deepest profile/remaining section, hinge, surface/edge preparation, cured coating and required finished appearance. Record the actual offered MDF and particleboard grades separately, with extra work and rejects. | Compare the routed painted part |
| Flat decorated carcass part | Decor master/texture/sheen, front/reverse, finished gauge, edge band and corner/connector detail. Compare faced MDF with faced particleboard at the same delivered stage and usable output. | Compare the decorated corner |
| Hinge or knock-down connection | Actual fitting, hole/pilot/edge positions, assembly sequence, finish and required connection assessment. Use each offered board’s full construction and properties; retain the completed joint and processing costs. | Compare the working connection |
The request keeps the selected MDF route with the particleboard alternative. Give the actual thickness and trial dimensions for each; keep both proposed constructions, relevant documents and finished outputs identifiable.
- Choose the part and the most demanding edge, profile or fitting detail.
- Identify the two board grades and any facing/reverse/edge requirements.
- Run the agreed machining and finishing process on the proposed boards.
- Compare fit, appearance, relevant data and the cost of an accepted part.
- Carry the selected construction and sample reference into the item schedule.
Samples are free. Buyers pay courier freight, with a credit on a later order available by agreement. Choose the starting material below, then describe the alternative you want alongside it.
Retain a small comparison record.
Give each proposed construction an item reference and record the supplied gauge, facing/reverse, trial operation and fitting. Keep the completed corner or profile, relevant documents and accepted-output cost beside that reference. This makes the next decision practical: retain the construction that reaches your required finished part, or revise the specific operation that caused the gap.
MDF and particleboard purchasing questions.
What is the difference between MDF and particleboard?
MDF is a fibre-based panel; particleboard uses bonded wood particles. Compare the offered type and grade around the furniture part, including its facing, edge, machining and fittings.
Is chipboard the same as particleboard?
In a furniture purchasing brief, chipboard commonly describes particleboard. Retain the exact product designation, construction and relevant documents in the quotation to identify the offered panel.
Which should I start with for a painted routed door?
Begin by evaluating plain MDF with your actual routed profile and full paint process. The trial should include the face, reverse, exposed edge and fitting detail that define the finished door.
Can MDF and particleboard share the same melamine decor?
A decorative finish can be offered on different substrates. Specify the actual decor reference, texture, sheen and front/reverse construction for each. Compare the board and edge band physically before selecting the furniture finish.
Which material holds screws or supports shelves better?
Use the properties of the offered grade and the actual fitting or shelf design. Include holes, edge distances, span, supports, loading and orientation where relevant. Request the corresponding data and assess the agreed assembly detail.
Is particleboard always the cheaper finished option?
Compare complete offers and accepted output. Cutting yield, facing, edging, finishing, handling, rework and delivery scope can change the cost of the component your factory produces.
What product documents should I request?
Identify board designation, construction and dimensions, then name the material, emission, moisture or mechanical methods relevant to the component and destination. For a faced panel, include the required surface information.
Can I buy different furniture panels in one container?
Yes. CUZI supplies mixed loads with a one-container minimum. Keep each board, thickness, format, finish and quantity under a separate item, and confirm the packing and schedule with the quotation.